

Wall cavity drying is the right call when moisture readings inside the wall are trending downward with surface airflow, the water is Category 1 or 2, and the finishes are worth saving. It works because it treats the stud bay as its own drying chamber instead of opening it up. Skip it and go straight to a flood cut when moisture won't budge after 24 hours, the water is Category 3, or the cavity is packed with wet insulation and inaccessible framing. Done right, cavity drying cuts demolition, keeps trim and paint intact, and shrinks the reconstruction bill.
TL;DR:
- Wall cavity drying is effective when moisture levels are decreasing with surface airflow, especially for Category 1 and 2 water losses, and when moisture readings are below 1% WME or under 19% MC within 24 hours.
- Cavity drying is usually appropriate if the wall has salvageable finishes and accessible framing, but must be avoided for Category 3 water or microbial contamination, which require a flood cut.
- Drilling small holes along the baseboard or behind trim enables air circulation using various methods like injection systems or ducting, with airflow positioning critical to prevent redistributing moisture or contaminants.
- Monitoring moisture content daily at consistent locations, including gypsum WME and wood MC, is essential to verify proper drying and prevent unnecessary demolition.
- Drying typically takes three to five days for straightforward setups, but long cavities or insulation may extend drying time, prompting removal if moisture levels plateau beyond this period.
Table of Contents
- When Do You Choose Wall Cavity Drying Over a Flood Cut?
- What Methods Work for Drying Inside a Wall?
- How Should Air Movers Be Positioned for Cavity Drying?
- How Do You Verify That a Wall Cavity Is Dry?
- How Do You Safely Drill Into a Wall for Drying?
- How Long Does Wall Cavity Drying Take?
- Why Choose Drying in Place Over Demolition?
- Practitioner Perspective: Standards-Aligned Drying in the Field
- Book a Wall Cavity Drying Assessment With Pure Resto
- Sources
- FAQ
When Do You Choose Wall Cavity Drying Over a Flood Cut?
The decision comes down to numbers, not guesswork. If gypsum board reads more than 1% WME above your dry-standard reference, or wood framing sits above 19% moisture content and isn't responding to surface airflow within 24 hours, that's your signal to escalate toward removal rather than continue drying in place, per the thresholds outlined in Restoration & Remediation Magazine.
Category matters just as much as the numbers. Category 1 and 2 water losses are generally strong candidates for cavity drying. Category 3 water, sewage backups, or anything with visible microbial growth usually pushes you toward a flood cut regardless of how the moisture meter reads, since drying in place traps contamination inside a wall you can't see.
Beyond moisture and category, weigh these factors before committing to a drying-in-place strategy:
- Whether the wall has salvageable wallpaper, specialty paint, tile, or built-ins worth protecting
- Whether the cavity is accessible enough for hose runs or drilled entry points without major obstruction
- The condition of existing insulation, since saturated batt insulation often needs replacement anyway
- How much business interruption a flood cut would cause versus a few extra days of equipment running
- What the insurance carrier's scope allows and whether documented moisture trending supports the approach
When two or more of those factors point toward "keep it closed," cavity drying earns its place in the drying plan.
What Methods Work for Drying Inside a Wall?
Once you've committed to drying in place, the method depends on access, cavity length, and how much visible repair you're willing to accept afterward.
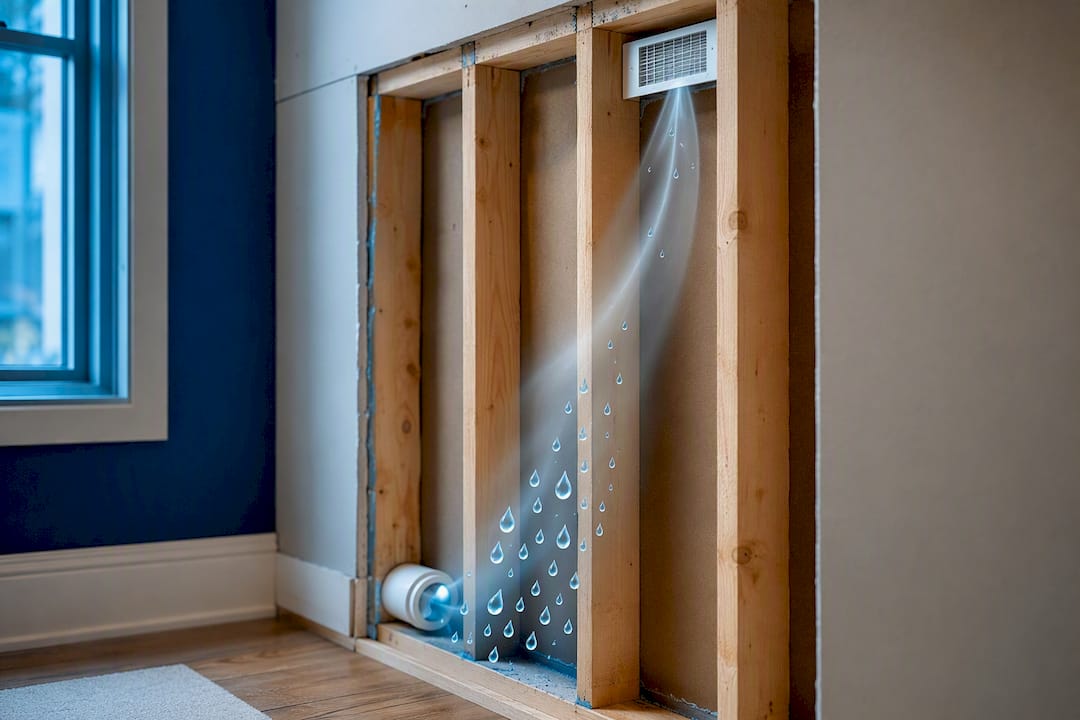
- Drill-access with angled air movers. Drill 5/8 inch holes at the base of the wall, angled slightly upward, spaced to hit each stud bay. This is the fastest setup for straightforward runs and leaves minimal texture repair when holes are placed along the baseboard line.
- Cavity injection systems. Dedicated injection kits, like the Injectidry HP-PLUS package, use penetrators sized for those same 5/8 inch holes paired with hose cuffs that distribute air evenly across a run instead of blasting a single point.
- Air mover adapters. Centrifugal and axial adapters snap onto a standard air mover and funnel output into a smaller opening, useful when you only have one or two access points and need concentrated airflow.
- Lay-flat ducting. Flexible ducting routes air behind cabinetry, around built-ins, or into cavities that connect to crawl spaces, letting you dry areas without exposing finished surfaces at all.
Each method trades speed against labor and risk. Drilled holes are quick but multiply patch work. Injection systems and hoseline setups from Restoration & Remediation Magazine's field guidance take longer to rig but handle long runs and sensitive areas, like server rooms, without disruption. Moving too much air too fast, though, risks redistributing moisture or, worse, contaminants deeper into the assembly.
Pro Tip: Set your exhaust or return point near the top of the cavity and your injection point near the bottom. That vertical through-flow clears moisture without pushing it sideways into a dry bay.
How Should Air Movers Be Positioned for Cavity Drying?
Airflow inside a wall cavity behaves differently than airflow across an open floor, and treating it the same way slows you down.
Start with a baseline of one air mover per accessible stud bay for tight runs, then adjust upward when framing, blocking, or old wiring breaks up the cavity into smaller pockets. More air movers doesn't always mean faster drying, though. Once material moisture enters the falling-rate stage, excessive velocity can actually stall the process rather than speed it, according to field guidance from C&R Magazine's breakdown of S500 chapter 12.
A few placement rules keep the airflow doing its job:
- Pair lower velocity with added heat or dehumidification once surface moisture drops and bound moisture becomes the bottleneck
- Use positive-pressure injection with a local exhaust point when the loss is clean, so air moves through and out rather than pooling
- Switch to negative-pressure extraction with HEPA filtration whenever contamination is a possibility, so you're pulling air out through filtration instead of pushing it further into the structure
- Match your dehumidifier type to the space: low-grain refrigerant (LGR) units handle warmer, wetter conditions efficiently, while desiccant units perform better in cooler spaces or when you need very low grain depression
Whether you run an open or closed drying system depends on ambient conditions outside the affected room, but the underlying rule holds across setups: air movement without monitored psychrometrics is a guess, not a drying plan.
How Do You Verify That a Wall Cavity Is Dry?
Verification is what separates a documented drying job from a hopeful one. Daily readings, taken at the same time each day, at the same locations, are what let you and the adjuster agree the cavity is actually dry rather than just less wet.
Every monitoring visit should capture temperature, relative humidity, and grains per pound (GPP) at the affected material, a control (unaffected) location, and outdoors. Layer in direct moisture-content readings on framing and WME readings on gypsum, then compare all of it against your dry-standard reference.
| Reading type | Target/threshold | Notes |
|---|---|---|
| Gypsum WME | Within 1% of dry standard | Per ANSI/IICRC S500 guidance |
| Wood framing MC | Below 19% | Higher readings after 24 hours signal cavity intervention |
| Relative humidity trend | Steady decline day over day | Flat trend across 2+ days signals a plateau |
| GPP differential | Narrowing gap vs. control room | Widening gap suggests hidden moisture source |
Photograph every reading location and log it against a floor plan. That record is what supports your invoice, satisfies the adjuster, and proves the job met S500 acceptance criteria rather than just "felt dry" to the technician.
How Do You Safely Drill Into a Wall for Drying?
Drilling into a finished wall carries real risk if you skip the prep work. Set an adjustable drill stop to control penetration depth and keep the bit from reaching wiring or plumbing runs hidden inside the stud bay, a habit experienced technicians treat as non-negotiable regardless of how "simple" the wall looks.
Place holes along the baseboard or behind trim where possible to minimize visible texture repair, and avoid puncturing fire-rated assemblies in multi-family or commercial buildings without confirming code requirements first.
- Assume lead paint on any building constructed before 1978 and follow EPA Lead RRP containment practices unless testing rules it out
- Use HEPA vacuums and PPE whenever the material history or contamination category is uncertain
- Vent cavity air through a controlled exhaust point rather than letting it disperse into occupied space
- Set up local exhaust or negative pressure before opening the first hole on any Category 2 or higher loss
Pro Tip: Keep a laminated depth-stop chart in your truck for common wall thicknesses. It takes ten seconds to check and it's cheaper than a plumbing repair.
How Long Does Wall Cavity Drying Take?
Most straightforward cavity setups reach S500 drying goals in three to five days when conditions are responsive. Complex cavities with insulation, multiple stud bays, or limited access can run longer.
- If readings plateau for two consecutive days, check for an air leak at the access point or exhaust hole first.
- If the plateau persists, suspect a hidden wet assembly, like insulation touching an exterior wall or a subfloor connection.
- If dehumidification capacity is maxed out for the space, add a unit or reposition existing equipment before extending the timeline.
- If none of that moves the readings within another 24 to 48 hours, removal is usually faster and safer than continued drying.
Communicate that fork in the road early. Clients and adjusters respond better to "here's the plateau, here are the two paths" than to a drying timeline that quietly stretches another week.
Why Choose Drying in Place Over Demolition?
Cavity drying costs more in labor and monitoring time upfront, but it usually saves money and disruption overall.
- Preserves wallpaper, specialty paint, tile, and built-ins that would otherwise need full replacement
- Keeps a home or business occupied during the drying period instead of forcing a temporary move
- Reduces total reconstruction scope, since there's no drywall, insulation, or trim to replace
- Still loses to demolition when contamination, sustained high moisture readings, or compromised insulation make removal the safer bet
Practitioner Perspective: Standards-Aligned Drying in the Field
Purerestomd built its response model around a simple idea: the faster a technician gets moisture readings and equipment in place, the more likely a cavity dries instead of getting torn out. Our 24/7 emergency response and IICRC-aligned procedures exist because the first hours after a loss decide whether Category 1 water stays Category 1. In the field, priorities are documentation, contamination control, and minimizing disruption, then a clean handoff to reconstruction when a wall genuinely can't be saved. Standards give you the threshold. Judgment on the ground still decides how you get there.
— Pure
Book a Wall Cavity Drying Assessment With Pure Resto
Most homeowners can't tell from the outside whether a wet wall needs three days of airmovers or a full flood cut, and guessing wrong costs money either way. Purerestomd sends technicians who map moisture readings room by room, build a documented drying plan against S500 thresholds, and hand you photos and logs your insurance adjuster can actually use.

Our IICRC certifications and 30-minute emergency response mean the assessment happens before surface moisture becomes a cavity problem, and every reading gets logged from day one instead of guessed at later. We coordinate directly with your insurance carrier, so you're not stuck translating technical reports yourself. If you're dealing with a wet wall right now, or want a professional read on whether cavity drying will save your finishes, request an assessment from Pure Resto and get a documented drying plan started today.
Sources
- ANSI/IICRC S500 Standard for Professional Water Damage Restoration
- What is acceptable dry? | Restoration & Remediation Magazine
FAQ
How Do You Dry Out a Wall Cavity?
Drill small access holes, typically 5/8 inch, near the base of the affected wall, then run air movers, injection hoses, or ducting to circulate air through the stud bay while monitoring moisture content daily until readings match your dry standard.
How Do You Dry Out Cavity Wall Insulation?
Wet insulation dries far slower than bare framing, so it usually needs sustained low-velocity airflow combined with dehumidification rather than aggressive air movers; if insulation stays saturated after several days of monitoring, replacement is often faster than continued drying.
How Do You Dry the Inside of a Wall Without Removing Drywall?
Use drilled access points, cavity injection systems, or lay-flat ducting to move conditioned or dehumidified air directly into the stud bay, then track wood framing moisture content and gypsum WME readings until they fall within S500 acceptance thresholds.
How Can You Dry Out Damp Walls Quickly?
Increase airflow through the cavity while adding dehumidification to pull moisture from the air, since air movement alone slows down once materials hit the falling-rate drying stage; a professional assessment can confirm whether the wall is responding fast enough to avoid demolition.