
Water in your crawl space is a serious problem that demands action today, not next weekend. The moment you spot standing water, puddles, or soaked insulation, your priority is this: cut power to the area, stop the water source if you can identify it, and remove standing water before mold can take hold (it can begin growing within 24–48 hours on wet wood and soil).
Immediate action checklist:
- Shut off electricity to the crawl space at the breaker before entering. If you smell sewage or see murky water, avoid the area and call a professional.
- Photograph everything before touching it. Timestamps on photos matter for insurance claims.
- Stop the source if possible: shut the main water valve for a plumbing leak, or check whether a downspout is dumping directly against the foundation.
- Remove standing water with a submersible pump or wet/dry vacuum, working from the deepest point outward.
- Call a licensed restoration contractor if water is more than a few inches deep, smells like sewage, or has been sitting for more than 24 hours.
Pro Tip: Never run a gas-powered generator inside or directly outside a crawl space access hatch. Carbon monoxide accumulates fast in enclosed spaces. Use electric pumps on a heavy-duty extension cord instead.
Key Takeaways
Crawl space water damage requires immediate extraction, accurate source diagnosis, and exterior drainage fixes before any encapsulation can hold long-term.
| Point | Details |
|---|---|
| Act within 24–48 hours | Mold can begin growing on wet framing within 24–48 hours; extraction and airflow must start immediately. |
| Diagnose before you fix | Match the visible sign to the source (runoff, groundwater, plumbing, condensation) before spending on repairs. |
| Exterior drainage comes first | Grade soil, extend downspouts, and install perimeter drains before sealing or encapsulating the crawl space. |
| Monitor with a moisture meter | Wood moisture content should read below thresholds generally recognized as safe before reinstalling insulation or laying a vapor barrier. |
| Call Purerestomd for major events | IICRC-certified, 24/7 emergency response across Maryland with direct insurance billing and full mold inspection scope. |
Table of Contents
- Why crawl space water damage is more serious than it looks
- How to find the source of water in your crawl space
- What to do immediately when you find water
- How long does a crawl space take to dry out?
- Long-term fixes that keep water from coming back
- What does crawl space repair actually cost?
- When should you call a professional restoration contractor?
- Does homeowners insurance cover crawl space water damage?
- What most homeowners get wrong about crawl space moisture
- Purerestomd responds to crawl space emergencies in Maryland within 30 minutes
- Sources
- FAQ
Why crawl space water damage is more serious than it looks
Most homeowners underestimate what a wet crawl space actually costs them. The damage is rarely just the water itself.
- Mold growth can begin within 24–48 hours on wet framing lumber and insulation. The EPA directly links mold exposure to respiratory irritation, allergic reactions, and worsened asthma, making moisture control the primary defense.
- Wood rot and structural damage develop when wood moisture content stays elevated for weeks. Framing lumber becomes structurally compromised when moisture content climbs above roughly 17–19%, a threshold that wet crawl spaces can hit and sustain.
- Pest attraction: standing water and damp soil draw termites, carpenter ants, and rodents, all of which cause independent structural damage.
- Energy loss: wet insulation loses most of its R-value. Wet fiberglass batts can lose most of their insulating effectiveness.
- Indoor air quality: a significant portion of the air in a home's first floor comes up from the crawl space through the stack effect, carrying mold spores, humidity, and odors with it.
Pro Tip: If your first floor feels stuffy or smells musty in summer, the crawl space is often the source, even when you can't see visible water. A $30 hygrometer placed near a floor register tells you fast.
How to find the source of water in your crawl space
Picking the wrong fix wastes thousands of dollars. Crawl space water commonly comes from several distinct sources, and more than one can be active at the same time.
| What you see | Most likely source |
|---|---|
| Puddles after heavy rain, near foundation walls | Surface runoff, poor grading, or clogged gutters |
| Steady small wet spot, rising water bill | Plumbing leak (supply line or drain) |
| Condensation on joists and pipes in summer | Humid outdoor air entering through vents |
| Water seeping through foundation wall cracks | Groundwater or hydrostatic pressure |
| Water near HVAC equipment | Condensate line overflow or disconnected drain |
Inspection checklist before you enter:
- Check gutters and downspouts for clogs or discharge points within 4 feet of the foundation.
- Walk the perimeter and look for ground that slopes toward the house rather than away from it.
- Inspect visible supply and drain lines for drips, stains, or mineral deposits.
- Look for HVAC condensate lines that terminate inside the crawl space.
- Note whether vents are open and whether the soil floor is bare or covered.
In humid climates, open foundation vents can actually make condensation worse by importing warm, moist outdoor air that then hits cooler surfaces inside. Building science research confirms that sealing vents and conditioning or dehumidifying the space is often the correct solution in hot-humid regions.
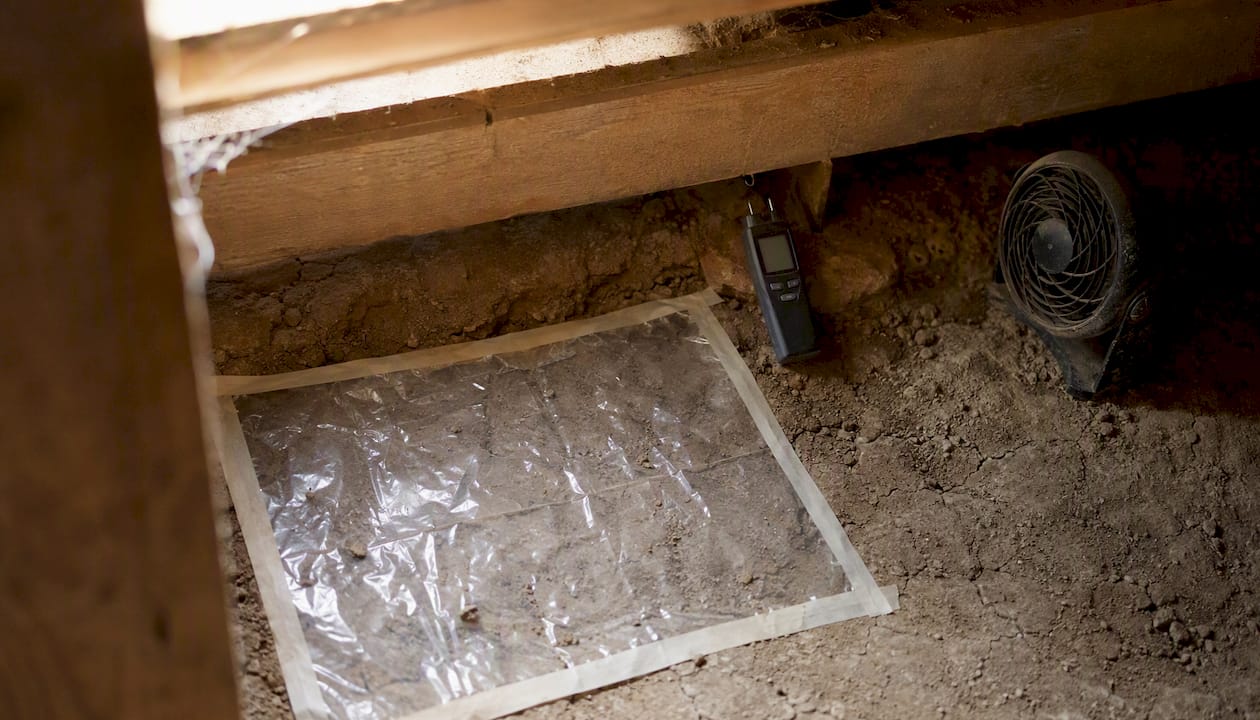
Diagnostic trick: Tape a clear plastic square to the soil floor and check it after about a day. Condensation location can help distinguish between soil vapor and atmospheric humidity as the source. That distinction changes which fix you need.
A homebuyer drain survey can also reveal hidden drainage failures around the foundation that aren't obvious from a visual inspection alone.
What to do immediately when you find water
Speed limits the damage. Work through these steps in order.
- Cut power at the breaker panel for any circuits serving the crawl space, sump pump outlets, or HVAC equipment in the space. If you're unsure which circuits are involved, shut off the main.
- Document before you touch anything. Shoot photos and short video clips of all standing water, wet insulation, stained wood, and any visible mold. Note the date and time.
- Identify and stop the source. Shut the main water supply valve for a plumbing leak. Clear a blocked downspout. You cannot dry a space that is still receiving water.
- Remove standing water. A submersible pump handles larger volumes; a wet/dry vacuum works for shallow puddles. Start at the lowest point and work toward the access hatch.
- Pull wet insulation. Saturated fiberglass batts trap moisture against wood and accelerate rot. Bag them and remove them from the space.
- Isolate wet contents. Move stored items, cardboard boxes, and wood materials out of the crawl space to dry in open air.
- Restore power only after the space is dry and a licensed electrician has confirmed no wiring was submerged.
Documentation checklist for insurance:
- Timestamped photos of all water and damage before any cleanup
- Photos of the water source (broken pipe, crack in wall, etc.)
- Receipts for all emergency equipment rentals or purchases
- Written notes on when you discovered the water and what you did first
How long does a crawl space take to dry out?
The honest answer depends on how much water entered and how quickly you act.
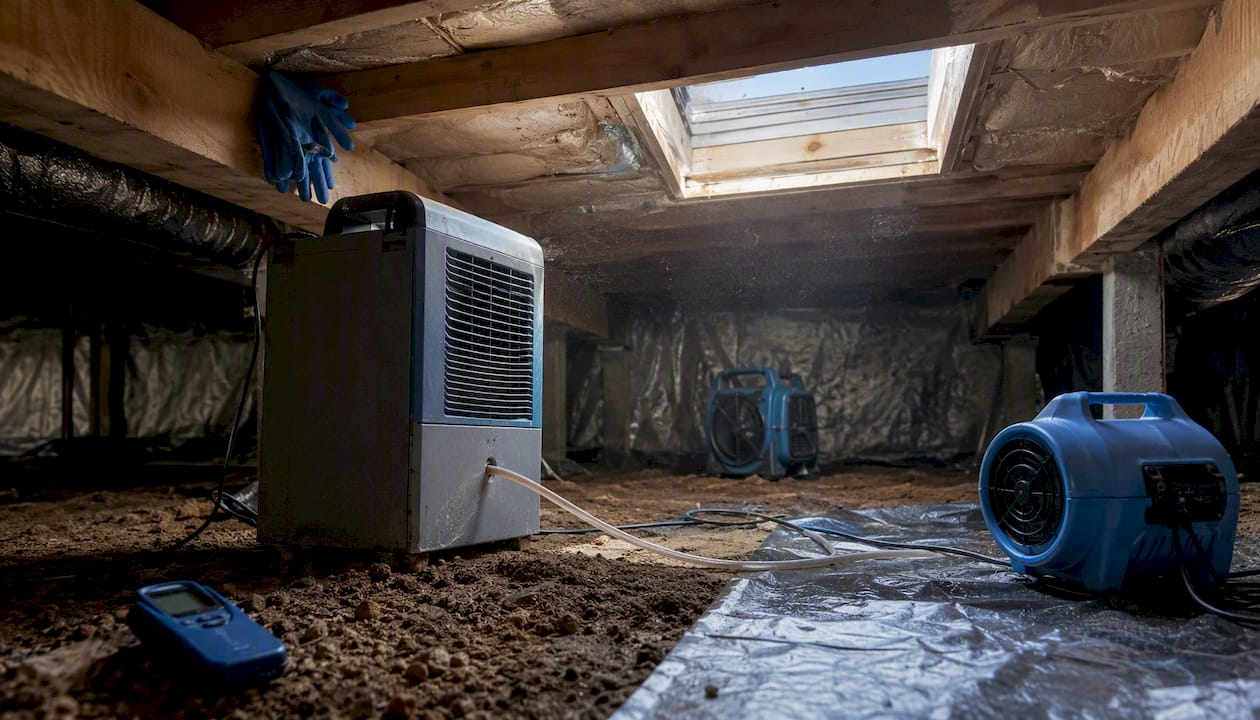
- Small puddle (under 1 inch, caught within hours): 48–72 hours with a wet/dry vac, two or three box fans positioned to push air across the floor, and a dehumidifier running continuously.
- Moderate flooding (1–4 inches, discovered within a day or two): several days to a week. You'll need a crawl-space-rated dehumidifier (not a standard household unit, which lacks the static pressure to move air in a low-clearance space) and daily moisture checks.
- Major flooding or long-standing water: professional drying equipment and several weeks of monitoring before wood moisture content returns to safe levels.
Monitoring targets and tools:
- Place a hygrometer at the center of the crawl space and at least one near the foundation wall where water entered.
- Target relative humidity below commonly recommended thresholds before closing the space back up.
- Use a pin-type moisture meter on floor joists and sill plates. Wood moisture content should read below 17–19% before you reinstall insulation or install a vapor barrier.
- Keep a daily log: date, humidity reading, moisture meter reading on two or three marked spots on the framing.
Proper drying requires extraction, controlled airflow, and a crawl-space-rated dehumidifier, with a moisture meter confirming safe levels before any encapsulation work begins. Household dehumidifiers are often undersized for the job. When in doubt, rent a commercial unit or hire a restoration contractor who brings industrial drying equipment.
Long-term fixes that keep water from coming back
Extraction and drying buy you time. They don't solve the problem. Exterior drainage must be addressed before sealing a crawl space, or you risk trapping water behind a vapor barrier and accelerating the rot you were trying to prevent.
Work through fixes in this order, exterior first:
- Regrade the soil around the foundation. The ground should slope away from the house at least 6 inches over the first 10 feet. This is often the cheapest fix with the biggest payoff.
- Extend downspouts. Discharge should land at least 4–6 feet from the foundation. Splash blocks alone are rarely enough.
- Install perimeter or French drains. For persistent surface runoff or high water tables, a perimeter drain channels water to a sump pit or daylight outlet to manage water before it enters the crawl space.
- Add a sump pump with battery backup. Sump pits should have sealed lids to prevent vapor from escaping into the conditioned space. Battery backup matters most during storms, when power outages and heavy rain arrive together.
- Encapsulate the crawl space. A vapor barrier of 6–20 mil polyethylene covering the entire floor, with seams overlapped and taped, extended up the foundation walls and around piers, is the core of encapsulation. Seal foundation vents after exterior drainage is confirmed working.
- Seal and insulate rim joists. Cut rigid foam to fit each bay and seal the edges with spray foam. This stops both air infiltration and condensation on cold framing in winter.
- Fix HVAC and plumbing issues. Insulate cold water supply lines to prevent sweating. Redirect condensate lines to drain outside the crawl space.
Sealing and conditioning a vented crawl space improves moisture control, energy efficiency, and indoor air quality when bulk-water sources are resolved first. Skip that sequencing and you've built a sealed, damp room.
Pro Tip: Install the sump pump and confirm it's cycling before you lay the vapor barrier. Running a pump under a sealed liner is possible but far more disruptive than doing it in the right order.
Encapsulation installation checklist:
- Vapor barrier: 6 mil minimum, 10–20 mil preferred for durability
- Seams overlapped at least 6–12 inches and taped with manufacturer-approved tape
- Barrier extends up foundation walls and is fastened at the top
- All piers wrapped and sealed at the base
- Vents sealed only after exterior drainage is confirmed functional
- Dehumidifier or conditioning system sized for the space's square footage
Maintenance schedule: Test the sump pump monthly by pouring water into the pit. Clean dehumidifier coils and filters every 60–90 days. Check moisture meter readings on framing twice a year, in late spring and early fall.
What does crawl space repair actually cost?
Costs vary by region, soil type, and damage extent, with clay soils and shallow water tables often causing persistent moisture issues that require combined solutions.
- Grading and downspout extensions: $500–$3,000 depending on the amount of soil work and landscaping involved. Often a DIY option for minor corrections.
- Sump pump installation: $1,000–$3,000 installed, more with battery backup and a sealed lid system.
- Interior perimeter drain plus sump: $3,000–$8,000 for a professionally installed system in a typical crawl space.
- Full encapsulation (vapor barrier, sealed vents, dehumidifier): $5,000–$15,000 depending on square footage and access difficulty.
- Professional mold remediation: $1,500–$6,000 for a contained crawl space treatment; more if structural framing requires treatment or replacement.
- Professional water extraction and structural drying: $1,500–$5,000 for a moderate flooding event, depending on equipment time and scope.
Single-day fixes like downspout extensions and minor grading are worth doing yourself. Once you're looking at perimeter drains, encapsulation, or mold remediation, the cost of a mistake (trapping moisture, improper containment) usually exceeds the cost of hiring a certified contractor.
When should you call a professional restoration contractor?
Some situations are beyond what a shop vac and a weekend can fix. Call a licensed water damage or mold remediation contractor when:
- Standing water is more than a few inches deep
- The water smells like sewage or is discolored
- You see sagging floor joists, bouncy floors, or visible structural movement
- Mold covers more than a small isolated patch
- The same area has flooded more than once
- You suspect groundwater or a high water table is the source
What a professional restoration scope typically includes:
- Emergency water extraction with truck-mounted or high-capacity equipment
- Structural drying with commercial air movers and dehumidifiers
- Moisture mapping with thermal imaging and pin/pinless meters
- Mold inspection and containment before remediation begins
- Targeted mold remediation with HEPA filtration and antimicrobial treatment
- Encapsulation and drainage installation
- Direct insurance billing so you're not fronting costs and waiting for reimbursement
Questions to ask any contractor before signing:
- Are you IICRC-certified in water damage restoration (WRT) and mold remediation (AMRT)?
- Will you provide before-and-after moisture readings in writing?
- Do you bill insurance directly, or do I pay and get reimbursed?
- What does your written scope of work and warranty cover?
- Can you provide references from similar crawl space jobs?
Red flags: no written scope, no moisture documentation, pressure to sign before you've seen a detailed estimate, or a contractor who wants to skip straight to encapsulation without addressing drainage.
Does homeowners insurance cover crawl space water damage?
Coverage depends almost entirely on the cause of the water, not the location.
What's typically covered:
- Sudden, accidental plumbing failures (burst pipe, failed supply line)
- Appliance overflow that reaches the crawl space
- Emergency mitigation costs when damage results from a covered peril
What's typically excluded:
- Long-term seepage or gradual leaks (insurers call this a maintenance issue)
- Groundwater, flooding, or surface water intrusion (requires separate flood insurance through the NFIP or a private carrier)
- Damage from neglected gutters, grading, or deferred maintenance
Claim documentation checklist:
- Timestamped photos of all water and damage taken before cleanup
- Moisture meter readings from a certified contractor
- Written contractor report identifying the source and scope
- Receipts for all emergency mitigation work
- Repair estimates from at least two licensed contractors
Pro Tip: Call your insurer before you start cleanup, not after. Many policies require prompt notification, and some cover emergency mitigation costs separately from the underlying damage claim. Keep every receipt from the moment you discover water.
What most homeowners get wrong about crawl space moisture
The most common mistake isn't ignoring the problem. It's fixing the symptom without fixing the source. A vapor barrier installed over wet soil, or vents sealed before exterior drainage is working, creates a sealed damp environment that accelerates the exact damage it was meant to prevent.
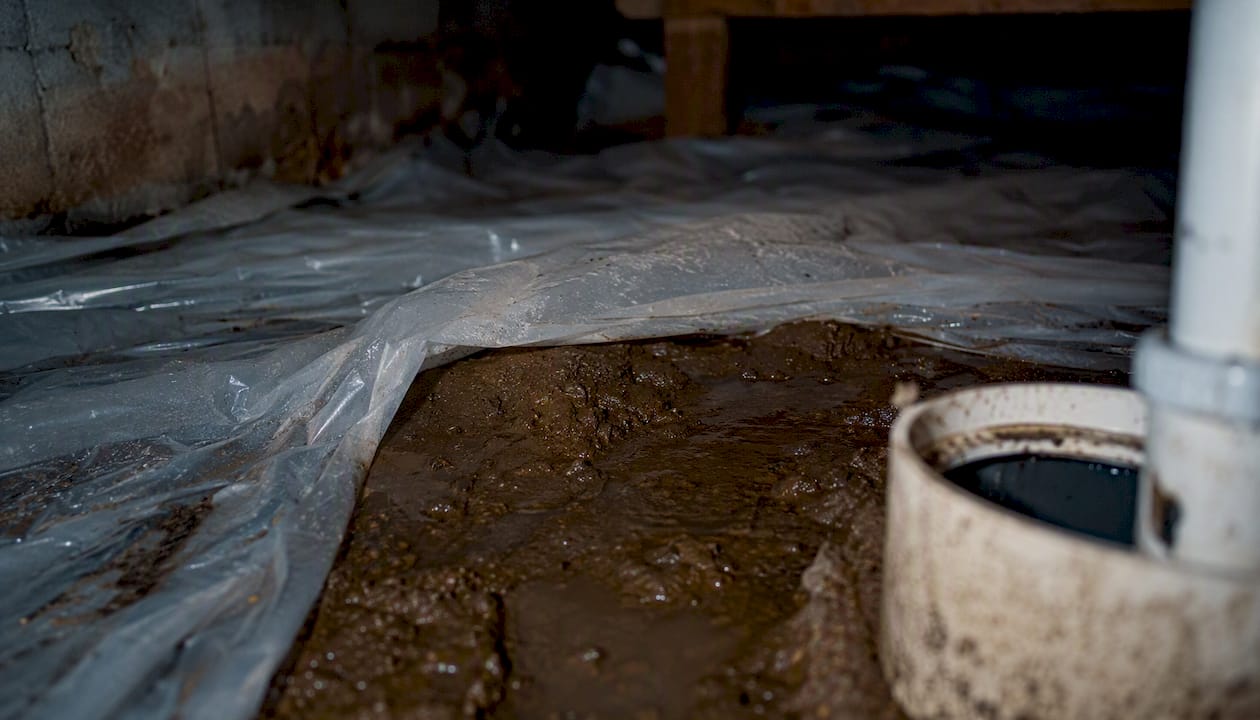
The second mistake is treating encapsulation as a one-time fix. A properly encapsulated crawl space still needs a functioning sump pump, a maintained dehumidifier, and periodic moisture checks. Building science has shifted firmly toward sealed, conditioned crawl spaces over vented ones, but that shift only holds when the mechanical systems inside the sealed space are maintained.
Speed matters more than perfection in the first 24–48 hours. Get the water out, get air moving, and document everything. The permanent fix can be planned carefully. The mold clock cannot be paused.
Purerestomd responds to crawl space emergencies in Maryland within 30 minutes
When the water is deeper than you can handle with a shop vac, or when you're not sure whether mold has already started, Purerestomd's IICRC-certified team is available 24/7 across Maryland with a 30-minute emergency response time.

The service covers the full scope: emergency water extraction, structural drying with commercial equipment, moisture mapping, mold inspection, containment, and remediation. Purerestomd bills insurance directly, so you're not managing reimbursement paperwork while your crawl space is still wet. Whether you need an emergency dispatch tonight or a scheduled inspection to assess moisture damage before it becomes a structural problem, contact Purerestomd to get a certified technician on-site fast.
Sources
- Guide to Closing and Conditioning Ventilated Crawlspaces
- Water management for existing crawlspace floors (BASC/PNNL resource guide)
- Mold and health (EPA)
- Water in your crawl space: causes and fixes (This Old House)
Consult a licensed local contractor or certified restoration professional for site-specific advice, as soil conditions, water table depth, and local building codes vary significantly by region.
FAQ
How serious is water in a crawl space?
Very serious. Standing water can trigger mold growth within 24–48 hours, weaken structural framing, and degrade indoor air quality throughout the home via the stack effect.
How do you fix water damage in a crawl space?
Remove standing water immediately, dry the space with fans and a crawl-space-rated dehumidifier, then address the source with exterior drainage fixes (grading, downspouts, French drains) before installing a vapor barrier or encapsulation system.
How long does a crawl space take to dry out?
A small puddle caught quickly can dry in 48–72 hours with proper airflow and dehumidification. Moderate flooding typically takes several days to a week; major flooding may require professional drying equipment and several weeks of monitoring.
Does homeowners insurance cover crawl space water damage?
Sudden plumbing failures are usually covered. Gradual seepage, groundwater intrusion, and damage from deferred maintenance are typically excluded. Flood damage requires separate flood insurance.