
Hardwood floors can often be saved after water damage, but the window for a full recovery is shorter than most homeowners expect. If you act within the first hour, stop the water source, and begin extracting standing water immediately, you preserve the best chance of drying and refinishing rather than replacing. Once boards start buckling or the subfloor goes soft, the math shifts toward replacement.
Do these right now:
- Shut off the water source and cut power to any affected area if there's standing water near outlets or appliances.
- Extract standing water with a wet vac or mop, then lift all rugs and move furniture off the wet section.
Do not:
- Apply direct heat from a hair dryer or space heater — rapid surface drying causes crowning that turns a reversible problem into an irreversible one.
- Use ammonia-based household cleaners; they react with wood finish and trap moisture beneath the surface.
Key Takeaways
| Point | Details |
|---|---|
| Stop and extract first | Shut off the water source and remove standing water within the first hour to preserve repair options. |
| Target EMC of 6–9% | Use a moisture meter daily; only sand or refinish once readings are stable at target for two consecutive checks. |
| Controlled drying takes weeks | Moderate cupping takes 2–6 weeks to dry; severe flooding with subfloor involvement can take 6+ weeks. |
| Call pros for red flags | Buckled boards, soft subfloor, visible mold, or sewage contamination require IICRC-certified restoration. |
| Purerestomd for Maryland homeowners | Purerestomd offers 24/7 emergency response, IICRC-certified drying, and direct insurance billing across Maryland. |
Table of Contents
- How do you assess hardwood floor water damage?
- What should you do in the first 24 hours?
- How does controlled drying actually work?
- Which repairs can you do yourself, and when should you call a pro?
- What are your repair options after the floor dries?
- What do repairs typically cost, and how long does it take?
- How can you prevent water damage to hardwood floors?
- What can you expect when you call a certified restoration pro?
- The repair advice most homeowners get is backwards
- Hardwood floor restoration in Maryland, done right the first time
- Sources
- FAQ
How do you assess hardwood floor water damage?
Damage follows a predictable sequence, and knowing which stage you're in determines whether you're looking at a $400 refinish or a $6,000 replacement. According to Soakedlocal, solid hardwood typically recovers when dried back to a 6–9% equilibrium moisture content (EMC); stage-three damage involving crowning, buckling, or delamination usually requires replacement.
Visible signs to check, in order of severity:
- Discoloration or finish clouding: Surface-level, often reversible with drying and light sanding.
- Cupping (edges higher than center): Moisture imbalance between top and bottom face. Reversible if caught early.
- Crowning (center higher than edges): Usually caused by over-drying or sanding too soon after cupping. More invasive to fix.
- Buckling: Boards physically lifting from the subfloor. Standing water can cause visible damage within hours, and engineered floors can delaminate even faster than solid wood.
- Seam separation or dark staining: Indicates prolonged exposure; mold risk increases significantly.
- Finish failure (white hazing, peeling): Moisture has breached the finish layer.
Taking moisture readings:
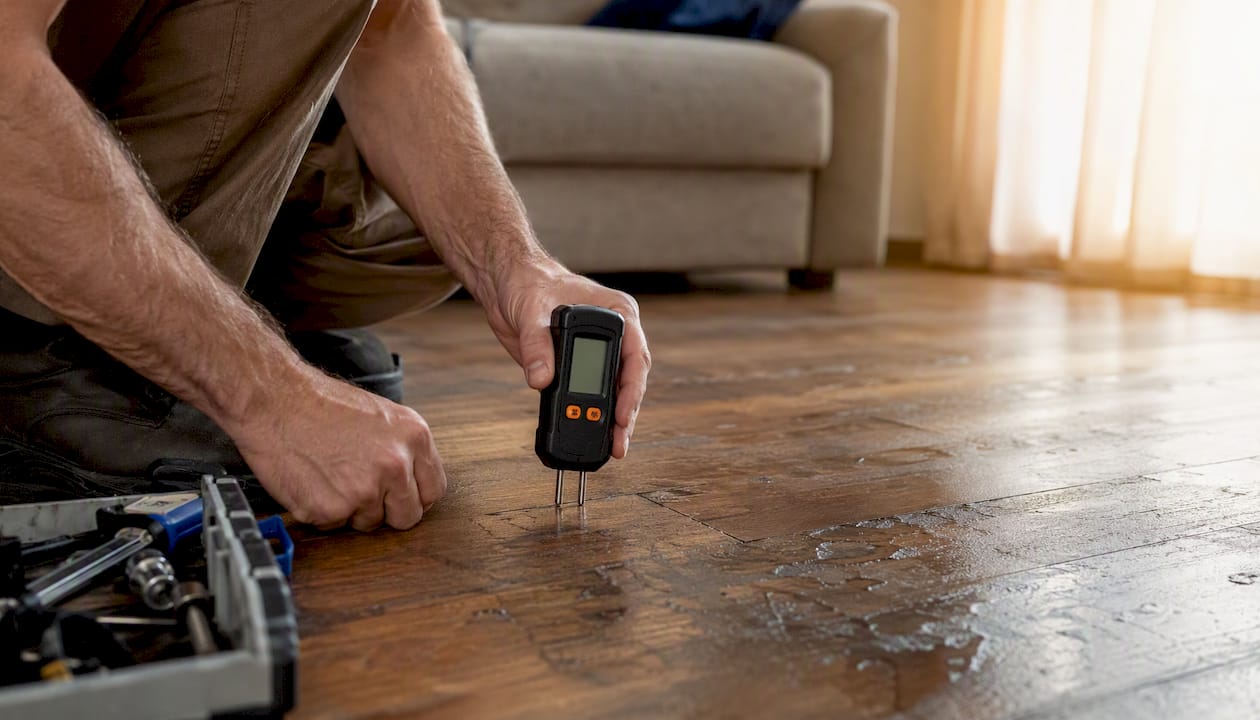
A pin-type meter (two probes pressed into the wood) gives you a direct reading of the wood's moisture content. A pinless meter reads a wider area faster but is less precise. For solid hardwood in a typical U.S. Take readings at the surface, at the subfloor through a vent or by removing a baseboard, and at several points across the affected zone.
For insurance documentation, especially when navigating claims related to water damage, professional services like Wisconsin Storm Damage & Insurance Claim Roofer | AM Exteriors can help coordinate and document your claim accurately.
Time-stamp every photo. Capture moisture readings on camera alongside the meter display. Note the water source, when you discovered it, and how long exposure likely lasted. This documentation is what insurers and adjusters use to determine coverage scope.
Pro Tip: If the floor feels soft or springy underfoot, or if you notice a persistent musty smell even after surface drying, the subfloor is likely wet. That changes the entire repair scope — subfloor compromise often means partial board fixes are only temporary until the subfloor is properly addressed.
What should you do in the first 24 hours?
Speed matters more here than technique. Standing water begins creating measurable damage within 1–3 hours, so the sequence below is ordered by urgency, not convenience.
Step-by-step mitigation:
- Stop the source. Turn off the supply valve, shut off the main if needed, or call a plumber. Nothing else matters until the water stops.
- Cut power to the affected area if water is near outlets, appliances, or the electrical panel. Don't assume it's safe.
- Extract standing water. A wet vac is the fastest tool most homeowners have. Work from the perimeter inward. Commercial extractors move water faster if you can rent one.
- Remove rugs, furniture, and anything porous from the wet zone. Wet rugs sitting on hardwood dramatically slow drying and create a secondary moisture source.
- Open interior doors and windows where outdoor humidity is lower than indoor. Run ceiling fans on low.
- Lift area rugs at the edges of the wet zone to check whether moisture has wicked beneath them.
Safety warnings:
- Sewage backups and floodwater from outside are Category 3 (black water) contamination. Wear rubber gloves, eye protection, and an N95 mask. Do not let children or pets into the area.
- Never assume electricity is off just because a breaker tripped. Verify with a non-contact voltage tester before stepping into standing water.
What not to do:
- No sanding. Wet wood fibers tear rather than cut cleanly, and sanding locks in moisture.
- No space heaters or heat guns aimed at the floor. Fast surface drying causes crowning.
- No ammonia cleaners or products with bleach on finished hardwood.
- Avoid walking on heavily buckled boards — they can splinter or collapse, and the subfloor beneath may be structurally compromised.
How does controlled drying actually work?
Surface fans alone won't dry a hardwood floor after significant water exposure. The moisture is in the wood fibers, the adhesive layer, and often the subfloor. Professional restoration follows a specific sequence: water extraction, moisture mapping with pin and pinless meters, drying-system setup using dehumidifiers and air movers, and daily monitoring until EMC targets are reached.
Equipment that actually moves the needle:
- Air movers (axial or centrifugal): Placed at 45-degree angles to the floor surface, not blowing straight down. They accelerate evaporation from the wood surface.
- Refrigerant dehumidifiers: Best for temperatures above 60°F. Pull moisture from the air as it evaporates from the floor.
- Desiccant dehumidifiers: Work in colder conditions (basements in winter) and pull moisture more aggressively at lower temperatures.
- Moisture meters and hygrometers: Track both wood EMC and ambient relative humidity. You're aiming for indoor RH below 50% during active drying.
Monitoring protocol:
Take moisture readings at the same locations every 24 hours and log them. The drying process is complete when readings are stable at target moisture levels for two consecutive 24-hour checks, not just when the surface feels dry to the touch.
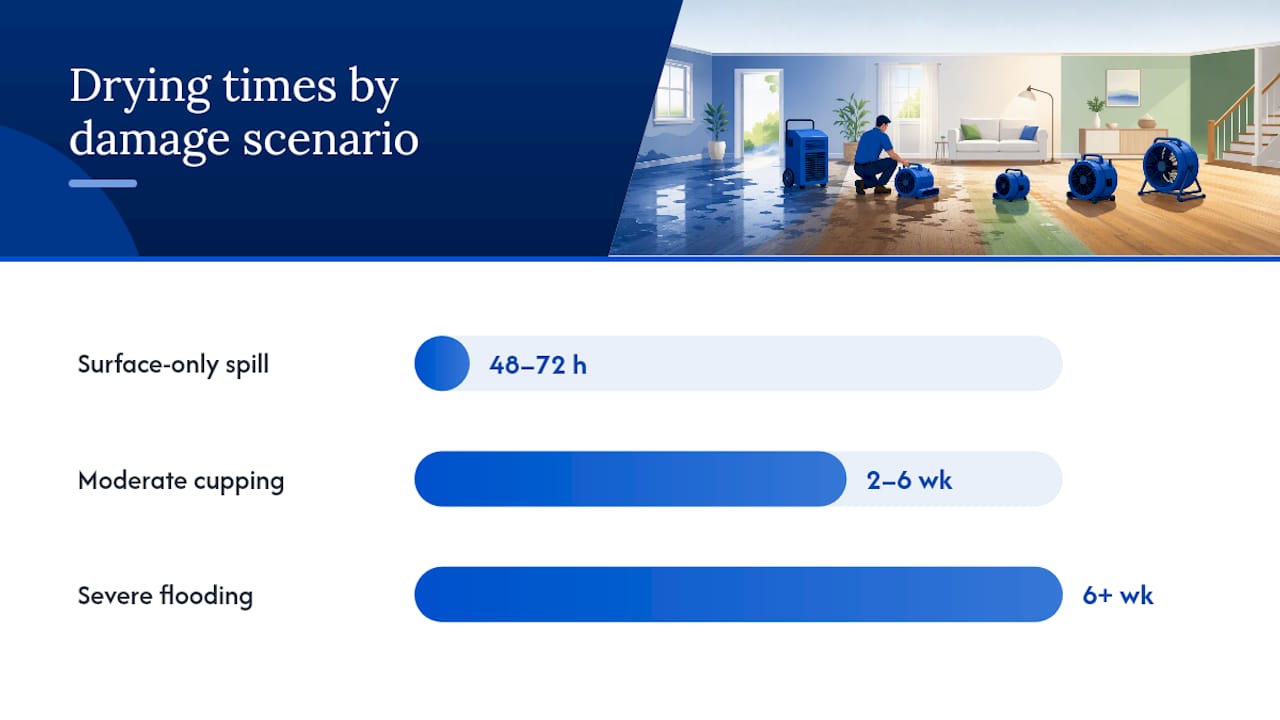
Realistic drying timelines:
| Damage Scenario | Estimated Drying Time |
|---|---|
| Surface-only spill, caught within 1 hour | 48–72 hours with active drying |
| Moderate cupping, exposure under 24 hours | 2–6 weeks |
| Severe flooding, subfloor involved | 6+ weeks |
| Engineered flooring with delamination risk | Often faster to fail; timeline varies |
Field experience from restorers working with oak hardwood confirms that moisture decline can take 1–4 weeks just to begin trending downward, depending on the wood species, subfloor type, and ambient conditions.
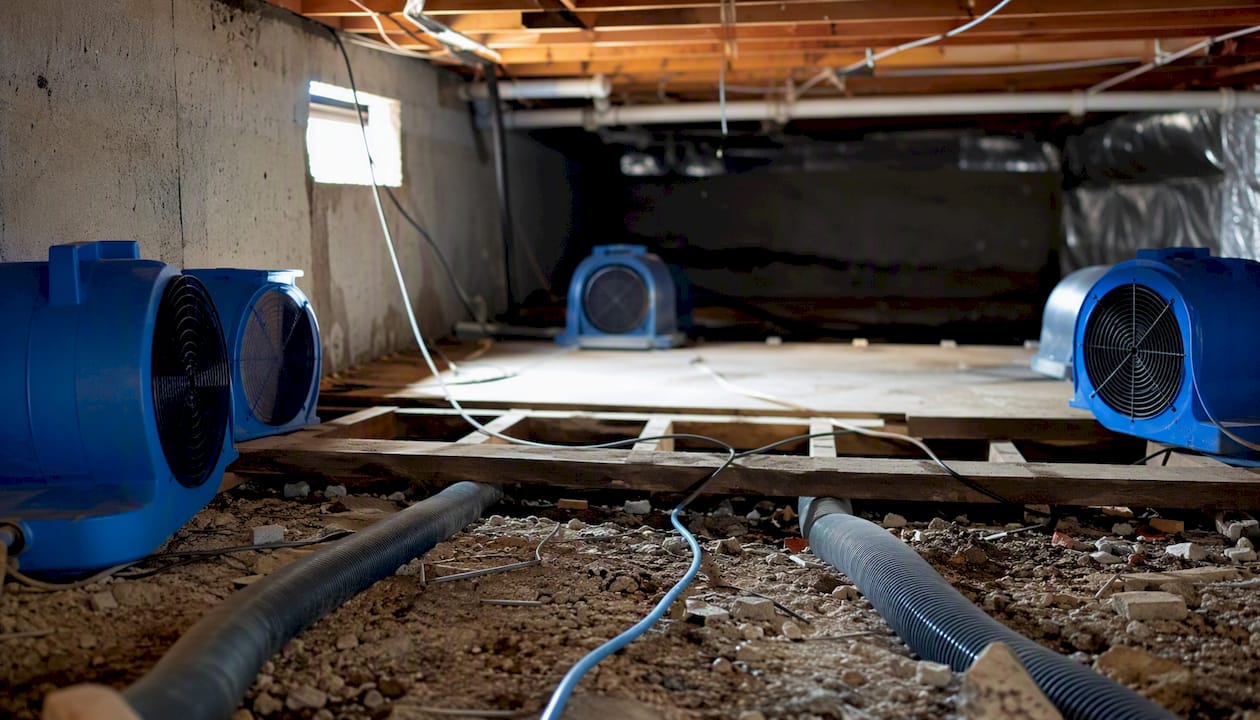
Pro Tip: When the subfloor is wet, in-place drying from the top alone is often insufficient. Pros use floor-lift drying systems that inject air beneath the flooring through drilled access points or removed baseboards. If you can access the crawlspace or basement below, direct an air mover upward through the floor cavity — it cuts drying time significantly.
Which repairs can you do yourself, and when should you call a pro?
The honest answer: most homeowners can handle the first 24 hours of mitigation. Beyond that, the decision depends on what the moisture meter says and what you find when you look at the subfloor.
DIY-appropriate tasks:
- Extracting standing water from a contained area (one room, no sewage contamination)
- Running consumer-grade fans and a portable dehumidifier
- Removing and drying rugs, furniture, and movable contents
- Placing weighted boards or sandbags on mildly cupped sections to encourage flat drying
- Documenting damage with photos and moisture readings
Red flags that require a restoration contractor:
- Boards are buckled or lifting at the seams
- Moisture readings stay elevated after 48 hours of active drying
- Visible mold or a persistent musty odor
- The subfloor feels soft, spongy, or shows dark staining
- The water source was sewage, floodwater, or an HVAC condensate line
- The affected area spans more than one room
Questions to ask any restoration company before hiring:
- Are your technicians IICRC-certified (specifically S500 for water damage)?
- What equipment will you bring on the first visit?
- What moisture end-point targets do you use, and will you provide written documentation?
- Do you bill insurance directly?
- What is your typical response time for emergency calls?
Restoration work that reveals a soft or compromised subfloor often turns into a larger project than the visible flooring suggests. Floorboard replacement frequently uncovers rot repair, subfloor replacement, or HVAC duct changes that weren't visible from the surface.
What are your repair options after the floor dries?
Three pathways exist, and the right one depends on how much of the wear layer remains and whether the subfloor is intact.
Sanding and refinishing: The least disruptive option when cupping has resolved after drying. Only viable when the wood has returned to stable EMC and readings are consistent across two consecutive checks. Solid hardwood can typically be sanded 3–5 times over its life, depending on wear-layer thickness. Engineered flooring has a thinner veneer and may only tolerate one light sand.
Partial board replacement: The right call when specific boards are buckled, cracked, or stained beyond what sanding can fix, but the surrounding floor and subfloor are sound.
Full replacement: Required when the subfloor is compromised, when delamination is widespread in engineered flooring, or when the damage covers most of the room and the wood can't be returned to stable moisture levels.
How to replace a single tongue-and-groove board:
According to Family Handyman's step-by-step guide, the process uses relief cuts, Forstner holes, chiseling, and micro-pin nailing:
- Mark the damaged board and score the finish along the cut lines with a utility knife.
- Drill Forstner holes at each end of the board to create a starting point for the oscillating saw.
- Make two relief cuts along the length of the board, staying inside the tongue and groove.
- Chisel out the center section, then carefully remove the side strips without damaging adjacent boards.
- Clean the subfloor and check for moisture or soft spots.
- Trim the bottom lip of the groove on the replacement board so it can drop into place.
- Apply construction adhesive to the subfloor, set the replacement board, and secure with a micro-pin nailer.
- Fill nail holes, then stain and finish to match.
Pro Tip: For the best grain match in a main-room repair, harvest a board from a closet or low-visibility threshold area and use that as your patch. Replace the closet board with a close-but-not-perfect match. Always test your stain and finish on scrap before touching the floor — age-darkened floors rarely match fresh stain straight from the can.
What do repairs typically cost, and how long does it take?
Costs vary by region, species, and damage severity, but these ranges reflect what industry sources report for U.S. markets.
Common cost ranges:
- Emergency water extraction and mitigation (dry-only): Typically $500–$2,500 depending on affected area and equipment days.
- Sanding and refinishing: Industry sources report roughly $3–$8 per square foot for sanding and refinishing, making it substantially less expensive than replacement when the floor can be stabilized.
- Partial board replacement (per board, professional): $100–$300 per board, depending on species availability and finish matching.
- Full hardwood replacement: Costs climb significantly when subfloor work, mold remediation, or contaminated-water cleanup is involved.
Factors that push costs higher:
- Engineered flooring with a thin wear layer that can't be sanded
- Subfloor replacement (adds material and labor on top of flooring costs)
- Mold remediation, which requires containment, treatment, and clearance testing
- Category 3 (sewage or floodwater) cleanup, which requires specialized PPE and disposal
Timeline summary:
| Scenario | Drying Time | Total Restoration Time |
|---|---|---|
| Surface spill, caught quickly | 48–72 hours | 3–5 days |
| Moderate cupping, one room | 2–6 weeks | 4–8 weeks |
| Severe flooding, subfloor wet | 6+ weeks | 2–4 months |
How can you prevent water damage to hardwood floors?
Most hardwood water damage events are preventable. The common culprits are appliance failures (dishwashers, refrigerator ice lines, washing machines), slow plumbing leaks behind walls, and HVAC condensate lines that back up silently for weeks.
Prevention checklist:
- Install smart leak detectors under the kitchen sink, behind the refrigerator, near the water heater, and at the washing machine. Devices like the Moen Flo or Phyn Plus monitor flow and alert you to anomalies before a slow leak becomes a flood.
- Keep indoor relative humidity between 35–55% year-round. Below 35%, wood shrinks and gaps open; above 55%, it absorbs ambient moisture and begins to cup even without a direct leak.
- Inspect supply lines to appliances annually. Braided stainless lines are more reliable than rubber hoses and worth the upgrade.
- Seal transitions and thresholds between hardwood and wet areas (bathrooms, laundry rooms) with quality silicone caulk and proper transition molding.
- After winter freeze-thaw cycles, check basement and crawlspace vapor barriers and ventilation. Ground moisture migrating upward is a slow but consistent source of subfloor saturation.
- Acclimate any replacement hardwood in the installation space for at least 72 hours before installing. Wood installed at the wrong moisture content will move as it adjusts.
Pro Tip: Place leak detectors at floor level, not on shelves. Water travels along the floor before it pools visibly, and a sensor mounted 6 inches up misses the first critical minutes of a slow leak.
What can you expect when you call a certified restoration pro?
When hardwood floor water damage crosses into buckled boards, elevated subfloor moisture, or visible mold, professional restoration is the faster and safer path. Purerestomd provides 24/7 emergency water damage restoration in Maryland with a 30-minute emergency response time, IICRC-certified technicians, and direct insurance billing.
What a Purerestomd call-out looks like:
- Arrival and initial assessment: Technicians arrive with commercial air movers, refrigerant and desiccant dehumidifiers, and calibrated moisture meters. The first task is a full moisture map of the affected area, including subfloor readings.
- Equipment setup: Air movers are positioned at 45-degree angles to maximize evaporation. Dehumidifiers are sized to the room volume and current relative humidity.
- Daily monitoring: Moisture readings are logged at consistent measurement points each day. Written dry-out targets (based on IICRC S500 standards) are documented from day one.
- Mold inspection: If readings stay elevated or the exposure duration was more than 24–48 hours, a mold inspection is recommended before any repairs begin.
- Insurance support: Purerestomd bills insurance directly and provides the documentation adjusters need: moisture logs, equipment records, and time-stamped photos.
Purerestomd also handles contents cleaning and secure storage when furniture or personal items need to be moved out of the restoration zone, and carpet cleaning for adjacent surfaces affected by the same water event.
The repair advice most homeowners get is backwards
The standard advice after a water event is "dry it out fast." Run fans, open windows, get the surface dry as quickly as possible. That instinct is wrong, and it causes more damage than the water itself in a significant number of cases.
Speed matters for extraction — getting standing water off the floor in the first hour is genuinely critical. But speed in the drying phase is where homeowners make expensive mistakes. Sanding too early, before the wood has returned to stable EMC, converts reversible cupping into crowning. Crowning requires more aggressive sanding or, in bad cases, board replacement. What was a $600 refinish job becomes a $3,000 partial replacement because someone ran a belt sander on a floor that still had elevated moisture.
The other piece of conventional advice that deserves scrutiny: the idea that a floor either "survived" or "didn't." In practice, the outcome depends almost entirely on what happens in the first 24–48 hours and whether the drying process is monitored properly. A floor that looks fine after surface drying can still have a wet subfloor that will cause cupping to return weeks later. A floor that looks badly cupped right after a flood can flatten completely if dried slowly and correctly.
The practical takeaway: patience in the drying phase is not passive. It's the most active decision you make in the whole process. Document everything, monitor daily, and don't touch a sander until two consecutive moisture readings confirm you're at target EMC.
Hardwood floor restoration in Maryland, done right the first time
When a pipe bursts or an appliance fails overnight, the difference between a refinish and a full replacement often comes down to how fast a professional arrives and how well the drying is managed from hour one.
Purerestomd is Maryland's 24/7 emergency water damage restoration service, built for exactly this situation. IICRC-certified technicians arrive within 30 minutes, set up commercial air movers and dehumidifiers, and begin moisture mapping before most homeowners have finished their second call to the insurance company. Every job includes written dry-out targets, daily moisture logs, and direct insurance billing so you're not chasing reimbursement paperwork on top of everything else.
If your floors are buckled, your subfloor feels soft, or you're seeing signs of mold after a water event, contact Purerestomd now for immediate emergency response across Maryland.
Sources
- Hardwood Floor Water Damage: When to Save and When to Replace
- Wood Floor Warped Water Damage Repair: Cupping, Crowning, and Buckling | WaterDamageFinder
- How to Replace a Damaged Hardwood Floor Board
- Hardwood Floor Water Damage Repair Steps
- Hardwood Floor Water Damage Repair: A Complete Professional Guide - D and G Flooring
FAQ
How long does it take for hardwood floors to dry after water damage?
Surface-only spills caught within an hour typically dry in 48–72 hours with active air movers and a dehumidifier. Moderate cupping from longer exposure takes 2–6 weeks; severe flooding with subfloor involvement can take 6 weeks or more before readings stabilize at target EMC.
How do you flatten a swollen hardwood floor?
Controlled drying is the primary method. Solid hardwood gradually. Weighted boards placed on cupped sections during drying can help encourage a flat result, but sanding should wait until readings are stable across two consecutive checks.
Will water under the floor eventually dry on its own?
Rarely, and not reliably. Without active airflow and dehumidification, moisture trapped beneath hardwood and in the subfloor can persist for months, creating conditions for mold growth and structural deterioration. Surface drying alone is insufficient when the subfloor is wet — professional below-floor drying or floor-lift systems are often needed to address moisture at that depth.
Can hardwood floors be saved after flooding?
Often yes, if the water is extracted quickly and drying is properly managed. Floors with buckled boards, delaminated engineered veneers, or a compromised subfloor are more likely to require partial or full replacement.