
A leaking roof is a time-sensitive emergency. Stop additional water entry if it's safe to do so, get people and valuables out of harm's way, document everything you can see, and call a certified restoration professional or roofer if the ceiling is bulging, the leak is active, or you suspect structural damage.
Your first three actions:
- Contain the water. Place buckets under drips, lay towels, and spread plastic sheeting over furniture and flooring.
- Protect people. Keep everyone away from the affected area, especially if water is near light fixtures or outlets. Water and electricity are a lethal combination — shut the circuit breaker for that zone only if you can do so while standing on dry ground.
- Document before you touch anything. Take wide-angle and close-up photos with timestamps. Note the time the leak started and what the weather was doing.
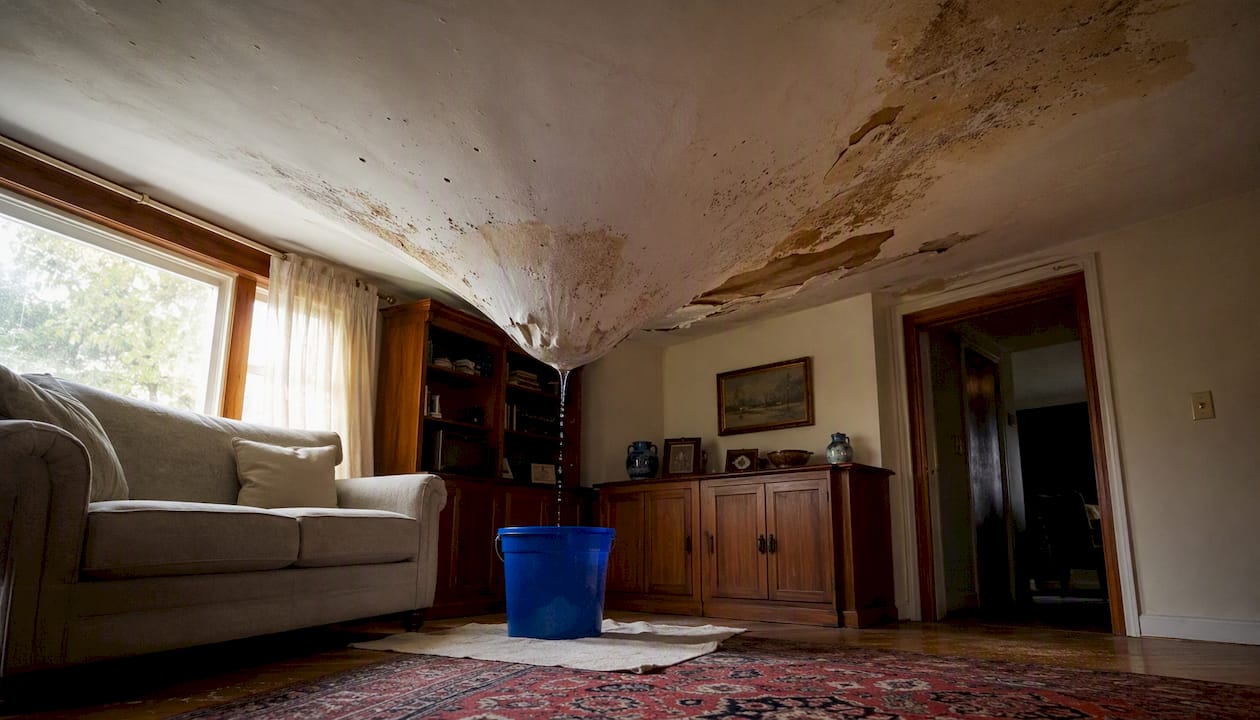
Pro Tip: If the ceiling is visibly bulging, it's holding water. Poke a small hole at the lowest point with a screwdriver to drain it in a controlled stream rather than letting it collapse. Stand to the side, not directly underneath.
If the ceiling is sagging significantly, the leak is large, or you see water near electrical panels, fall protection standards for roofing work make clear that untrained access to a roof is dangerous — call a professional immediately rather than climbing up yourself.
Key Takeaways
Roof leak water damage requires immediate containment, documentation, and professional drying within 24–48 hours to prevent mold growth, structural damage, and higher restoration costs.
| Point | Details |
|---|---|
| Act within 24–48 hours | Mold can begin growing within 24 hours of water exposure — start drying immediately. |
| Document everything | Time-stamped photos, receipts, and a written timeline materially improve insurance claim outcomes. |
| Match the pro to the problem | Call a roofer to stop entry, a restoration company to dry and remediate, a plumber if the source isn't the roof. |
| Insurance covers sudden events | Covered perils (wind, hail, falling objects) are typically covered; wear-and-tear and neglect are not. |
| Purerestomd responds 24/7 | IICRC-certified restoration with a 30-minute response time and direct insurance billing across Maryland. |
Table of Contents
- How do you know if a roof leak is causing water damage?
- How to trace where water is entering your roof
- Emergency containment steps to take inside the house right now
- Temporary roof fixes you can safely use until a contractor arrives
- When should you call a roofer vs. a restoration company vs. a plumber?
- Does homeowners insurance cover roof leak water damage?
- What happens when you delay repairs: a timeline of risk
- What drives the cost of roof leak repairs and restoration?
- How to prevent future roof leaks and water damage
- Why prompt, certified restoration makes a real difference
- Purerestomd responds to roof leak water damage in Maryland 24/7
- Sources
- FAQ
How do you know if a roof leak is causing water damage?
Catching signs of water damage early is the difference between a $500 repair and a $15,000 restoration. Check both inside and outside.
Interior signs to look for:
- Dark brown or yellow stains on ceilings or upper walls
- A roof leak ceiling bubble — paint or drywall that's blistering, peeling, or bulging outward
- Musty or earthy odors in rooms that didn't smell before
- Doors or windows that suddenly stick (framing swells when wet)
- Soft, spongy spots when you press on drywall
- Visible mold growth, often appearing as dark speckling along wall seams or ceiling edges
Exterior signs you can check from the ground:
- Missing, curled, or cracked shingles
- Damaged or lifted flashing around chimneys, skylights, or vents
- Gutters overflowing or pulling away from the fascia
- Sagging roofline sections
- Branches or debris resting on the roof surface after a storm
One thing most homeowners miss: water can travel along structural paths before it drips through the ceiling, so the stain you see indoors may be several feet away from where water is actually entering the roof. Don't assume the leak is directly above the damage.
For documentation purposes, the most useful photos are wide shots showing the stain's location relative to the room, close-ups of the stain edges (which show whether it's fresh or old), and exterior shots of the roof area you suspect, taken from the ground.
How to trace where water is entering your roof
A methodical attic check is the fastest way to narrow the leak source without climbing onto the roof. Attic inspections commonly reveal darkened sheathing, wet nail tips, compressed insulation, and water trails at penetrations — all of which point toward the entry zone.
Step-by-step attic inspection:
- Shut the circuit for any electrical fixture that's near or below the wet area before entering the attic.
- Bring a good flashlight and wear a dust mask — attics can harbor mold spores even before you can see growth.
- Look for darkened wood sheathing. Wet wood turns noticeably darker than dry wood and may feel soft.
- Check nail tips. Nails that penetrate the sheathing will show rust or moisture beading when there's active wetting.
- Follow the wet trail upward. Water runs downhill along rafters and sheathing before it drips — trace it back to the highest wet point.
- Inspect every penetration. Pipe boots, vent flashings, chimney flashing, and skylight curbs are the most common entry points.
If you can safely station a helper inside while someone watches from the ground during the next rain, you can often pinpoint the entry zone in real time. Common culprits include clogged gutters, missing or damaged shingles, failed pipe boots, and damaged flashing around chimneys or skylights.
Safety boundary: Do not climb onto a steep, wet, or high roof without fall protection equipment and training. Roofer injuries and fatalities are frequently tied to falls and unsafe access. If the roof pitch is steep, the surface is wet, or you're not confident, call a licensed roofer to complete the exterior inspection.
Key fact: The entry point on the roof and the visible stain on the ceiling are rarely in the same spot. Always trace the leak path from the attic before assuming you've found the source.
Emergency containment steps to take inside the house right now
Once you've documented the damage, shift to limiting it. Industry guidance from insurers and restoration professionals consistently points to the same priorities: contain the water, protect contents, and start drying as fast as possible.
What to do right now:
- Place buckets or large containers under active drips; line the floor with plastic sheeting to protect hardwood or carpet.
- Move furniture, electronics, rugs, and anything irreplaceable out of the affected zone.
- If the ceiling is bulging, drain it with a small puncture at the lowest point (stand to the side).
- Shut the circuit breaker for the affected room if water is near any fixture — do this only while standing on completely dry flooring.
- If water is near the electrical panel itself, call an electrician before touching anything.
- Start a wet/dry vacuum on standing water immediately; follow with a dehumidifier and open windows if outdoor humidity is lower than indoor.
Pro Tip: Consumer Reports notes that household fans can overheat during continuous use — rent professional-grade air movers from a hardware store or restoration company when possible, especially if you're drying for more than a few hours.
The 24–48 hour window is critical. Mold can begin growing within about 24 hours of water exposure, and the longer wet materials stay wet, the more drywall, insulation, and framing you'll ultimately need to replace. Acting in the first day cuts both restoration scope and cost.
Temporary roof fixes you can safely use until a contractor arrives
Temporary measures buy you time — they don't replace a proper repair. Know the line between what's safe to attempt and what to leave for a licensed roofer.
Safe homeowner options:
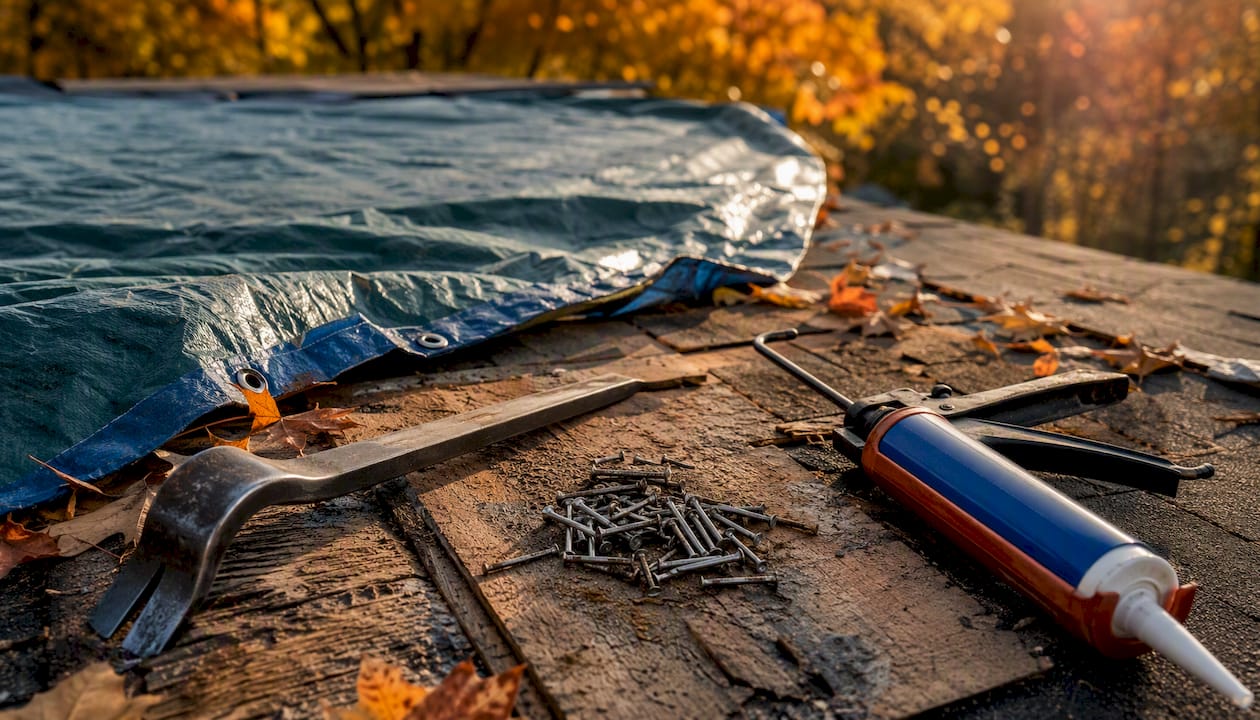
- Tarps: A heavy-duty polyethylene tarp secured over the damaged area is the most effective short-term fix. Lay it from the ridge down over the problem zone and weight or nail the edges to prevent wind lift. Only do this on a dry day, on a low-pitch roof you can safely access from a ladder.
- Interior temporary patches: For small ceiling stains that have stopped dripping, a coat of stain-blocking primer (like Zinsser BIN) can prevent the stain from bleeding through while you wait for repairs.
- Wet insulation: Don't try to save soaked insulation. Wet fiberglass or cellulose holds moisture against framing and becomes a mold incubator. Remove it and bag it.
What to have on hand:
Tarps, roofing nails, a pry bar, sealant (roofing caulk or Henry's wet-patch), buckets, towels, a wet/dry vacuum, and a dehumidifier cover most triage scenarios.
Decision rule: If the roof pitch is greater than 4:12 (roughly 18 degrees), the surface is wet or icy, or the damaged area is near the ridge or a valley, leave the exterior work to a pro. Height plus a slippery surface is where DIY roof access becomes genuinely dangerous.
Pro Tip: When you call a roofer, ask specifically whether they can install an emergency tarp the same day. Many licensed roofing contractors offer this as a standalone service, and it's often covered under your homeowners insurance claim as a mitigation expense.
When should you call a roofer vs. a restoration company vs. a plumber?
The right professional depends on where the problem is, not just what you can see.
Use this decision flow:
- Call a roofer first when the entry point is clearly the roof — missing shingles, damaged flashing, a failed pipe boot. The roofer stops new water from entering.
- Call a water-damage restoration company when interior materials are wet, soaked, or contaminated, or when you need professional drying, moisture mapping, mold assessment, or contents handling. A roofer fixes the entry point; a restoration company handles everything the water already touched.
- Call a plumber when the leak source might be a plumbing pipe, a condensate line, or an HVAC drain rather than the roof itself — especially if the leak occurs during dry weather.
Questions to ask any contractor before hiring:
- Are you licensed and insured in this state?
- For restoration companies: are your technicians IICRC certified?
- Do you offer 24/7 emergency response?
- Can you bill my insurance company directly?
- Will you provide a written, line-item estimate before starting work?
- Can you provide local references from similar jobs?
Red flags: High-pressure sales tactics, refusal to provide a written estimate, crews that can't show a license or certificate of insurance, and anyone who insists on cash payment only. After major storms, unlicensed "storm chasers" are common — verify credentials before signing anything.
A restoration crew's scope is fundamentally different from a roofer's. Restoration professionals use moisture meters and thermal imaging to map hidden wetting, perform selective demolition of saturated materials, run controlled drying with calibrated equipment, and conduct clearance testing if mold is suspected. A roofer patches or replaces the roof assembly. You often need both.
Does homeowners insurance cover roof leak water damage?
The short answer: usually yes for sudden, accidental events — and usually no for gradual deterioration or neglect.
Homeowners insurance generally covers roof leaks caused by covered perils — wind, hail, falling objects, the weight of ice or snow, fire, and lightning. Damage from wear-and-tear, aging shingles, or deferred maintenance is typically excluded.
Covered perils to look for in your declarations page:
- Wind and hail damage
- Falling objects (tree limbs, debris)
- Weight of ice, snow, or sleet
- Lightning strikes
- Fire damage to the roof
Documentation steps for a successful claim:
- Time-stamped photos and video of all visible damage, taken before any cleanup
- A written timeline: when you first noticed the leak, what the weather was, and every action you took
- Receipts for emergency purchases (tarps, buckets, dehumidifier rental)
- Written estimates from both a roofer and a restoration company
- A storm damage report from your roofer if wind or hail is involved
- Before-and-after images as work progresses
The insurance claims process typically involves filing the claim, an adjuster inspection, and a coverage determination that may include both roof repairs and interior restoration if a covered peril caused the damage. Restoration companies experienced in direct insurance billing can submit documentation directly to your adjuster, which speeds the process and reduces the back-and-forth on your end.
What happens when you delay repairs: a timeline of risk
Waiting even a day or two after a roof leak turns a manageable repair into a much larger project.
| Time After Water Exposure | What's Happening | Recommended Action |
|---|---|---|
| — | Active wetting, surface saturation begins | Contain, document, shut affected circuits |
| 2–24 hours | Drywall and insulation absorbing moisture | Begin drying; call restoration pro |
| 24–48 hours | Mold spores can activate; wood framing at risk | Professional moisture mapping required |
| 48 hours | Mold visible; insulation likely unsalvageable | Selective demolition, professional drying |
| 1 week+ | Structural framing rot possible; mold established | Full remediation, potential structural repair |
Risks that compound with delay:
- Mold growth in wall cavities and attic sheathing, which requires professional mold inspection and remediation
- Rot in roof framing, rafters, and wall studs
- Insulation that loses R-value permanently once saturated
- Electrical hazards from water wicking into junction boxes or wiring
- Higher restoration costs as more material requires replacement rather than drying
Professional response at the 24–48 hour mark typically involves moisture meters and thermal cameras to map hidden wetting, targeted removal of saturated drywall or insulation, and calibrated air movers paired with dehumidifiers. Clearance testing follows if mold is suspected.
What drives the cost of roof leak repairs and restoration?
Costs vary widely because no two leaks are the same. Understanding what drives the number helps you read estimates fairly.
Primary cost factors:
- Leak source complexity: A single failed pipe boot costs far less to repair than failed valley flashing or a deteriorated chimney surround.
- Roof pitch and access: Steeper roofs require more safety equipment and take longer — that shows up in labor costs.
- Interior damage area: The square footage of wet drywall, insulation, and flooring directly determines material and labor costs.
- Mold presence: If mold is found, remediation adds scope, containment barriers, air scrubbers, and clearance testing.
- Materials: Architectural shingles cost more than three-tab; cedar or tile cost more still.
What a restoration estimate should include:
- Scope of work with moisture targets for drying verification
- Line items for demolition, drying equipment, and replacement materials
- Equipment list (air movers, dehumidifiers, moisture meters)
- A realistic timeline for drying (often 3–5 days) and full repairs
- Payment and insurance billing arrangements
Get at least two written estimates before committing. Ask for line-item pricing — a lump-sum bid makes it impossible to compare fairly or understand what you're paying for. Verify that each contractor carries general liability insurance and, for restoration work, IICRC certification.
How to prevent future roof leaks and water damage
Most roof leaks are preventable with consistent, seasonal maintenance. The repairs that get skipped in October tend to show up as ceiling stains in January.
Maintenance checklist:
- Clean gutters twice a year (spring and fall) and after major storms — clogged gutters back water up under shingles.
- Inspect flashings after every significant storm. Chimney, skylight, and vent flashings are the most common failure points.
- Trim overhanging branches to at least 10 feet from the roof surface to reduce debris accumulation and impact risk.
- Check attic ventilation annually — poor ventilation causes moisture buildup that degrades sheathing from the inside.
- Replace worn pipe boots proactively; rubber boots typically last 10–15 years and fail before the shingles around them.
- Schedule a professional roof inspection every 3–5 years, and immediately after any hail event or major windstorm.
Pro Tip: When prioritizing repairs, fix flashings and penetrations before replacing shingles. A new shingle field with failed flashing will leak just as fast as the old one. Small flashing repairs — often under $300 — routinely prevent thousands of dollars in interior damage.
Why prompt, certified restoration makes a real difference
The gap between a contained leak and a full mold remediation project often comes down to how fast professional drying starts. IICRC-certified technicians follow the Institute of Inspection, Cleaning and Restoration Certification's S500 standard for water damage — which means moisture mapping before any drying begins, not just running fans and hoping for the best.
Certified restoration teams bring calibrated equipment: commercial-grade dehumidifiers that pull far more moisture per hour than any unit you'd rent at a hardware store, thermal cameras that find hidden wet pockets behind walls before they become mold colonies, and moisture meters that confirm materials are actually dry before reconstruction begins. That verification step is what prevents a callback six months later.
The sequencing matters too. A restoration crew coordinates with your roofer and your insurance adjuster — stopping the entry point, stabilizing the interior, and documenting scope in a format adjusters recognize. That coordination shortens the claim timeline and reduces disputes over what's covered.
Purerestomd responds to roof leak water damage in Maryland 24/7
When a roof leak has already reached your ceilings, walls, or floors, the clock is running. Purerestomd provides 24/7 emergency water extraction, professional moisture mapping, controlled drying, and mold inspection and remediation for homeowners across Maryland — with a 30-minute emergency response time that limits how far the damage spreads before drying begins.

Every job includes direct insurance billing, so you're not managing paperwork between your adjuster and your contractor. Technicians are IICRC certified, and the service area covers communities throughout Maryland. If you're dealing with wet ceilings, soaked insulation, or visible mold after a roof leak, have your address, a brief description of the visible damage, and confirmation that the area is safe to enter ready when you call.
Contact Purerestomd for immediate help — or if mold is already a concern, see the mold inspection services in Adelphi, MD and surrounding areas.
Sources
- Signs of water damage in your home | Consumer Reports
- Roof Leak Water Damage Cleanup First Day Steps and Tips – Total Dry Restoration
- Leaking roof: Here's what to do | State Farm
This article is general information, not a substitute for advice from a qualified financial advisor. Consult a qualified financial professional about your own circumstances before acting on anything here.
FAQ
Does home insurance cover water damage from a leaking roof?
Homeowners insurance typically covers roof leak water damage when a covered peril — wind, hail, falling objects, ice or snow weight, lightning, or fire — caused the leak. Damage from aging materials, neglect, or gradual wear is generally excluded, per Progressive's coverage guidance.
How long before a roof leak causes serious damage?
Mold can begin growing within 24 hours of water exposure, and drywall and insulation degrade quickly after that. Professional drying should start within 24–48 hours to limit restoration scope and prevent hidden mold growth.
Is fixing a roof leak expensive?
Cost depends on the source complexity, roof pitch, and how much interior material is affected. A simple pipe boot repair may run a few hundred dollars, while a full roof section replacement combined with interior restoration can reach several thousand — mold remediation adds further cost if drying is delayed.
What should I do immediately if my roof is leaking?
Contain the drip with buckets and plastic sheeting, move valuables out of the affected area, shut the circuit breaker for the zone if water is near fixtures (only from dry ground), and document everything with time-stamped photos. If the ceiling is bulging or the leak is large, call an emergency restoration professional right away.