
When you find a refrigerator water line leak, the fastest way to stop the damage is simple: shut off the water, unplug the fridge, and soak up whatever's already on the floor before you touch anything else. Once the immediate mess is under control, you can figure out whether the culprit is a loose fitting, a cracked tube, or something inside the appliance that only looks like a water line problem.
Do this in order, right away:
- Turn off the dedicated shutoff valve behind or under the fridge (or the main water shutoff if you can't find it)
- Unplug the refrigerator from the wall outlet
- Lay towels down and set a bucket under the leak point to catch runoff
Pro Tip: Lay a single dry paper towel along the supply line and connections, then wait 60 seconds. Wherever it darkens first is your leak point, and that beats guessing while water keeps dripping.
Key Takeaways
Stopping a refrigerator water line leak fast, then correctly identifying whether the source is the supply line, a fitting, or an internal drain, prevents a $20 repair from becoming a multi-thousand-dollar water damage claim.
| Point | Details |
|---|---|
| Shut off water and power first | Close the dedicated shutoff and unplug the fridge before inspecting or touching anything wet. |
| Trace before you repair | Use dry paper towels at each joint to confirm the exact leak point instead of guessing. |
| Match the fix to the cause | Tighten fittings, swap to braided stainless line, or use a push-to-connect union depending on what failed. |
| Use model-specific parts | Inlet valves, filters, and door seals vary by brand and model; order by model number, not appearance. |
| Call a pro past the drip stage | Soaked flooring, cabinet swelling, or a musty smell mean it's time to bring in a certified restoration team like Purerestomd. |
Table of Contents
- Safety Checklist Before You Inspect the Water Line
- What Usually Causes a Fridge Water Line Leak?
- How Do You Find the Exact Source of the Leak?
- How to Fix a Refrigerator Water Line Leak Yourself
- Fast Fixes to Stop Water Damage Right Now
- Preventing the Next Refrigerator Water Line Leak
- What Does It Cost to Fix a Leaking Refrigerator?
- When Should You Call a Professional Instead of DIY?
- How Restoration Professionals Handle Water Damage From a Fridge Leak
- Inspecting and Repairing Refrigerator Door Water Line Seals
- Should You Test Your Home's Water Pressure?
- Do Temperature Swings and Defrost Cycles Cause Leaks?
- Choosing the Right Replacement Part for Your Refrigerator
- Reconnecting the Water Line Safely After Any Repair
- A Practical Take on DIY Versus Calling in Help
- When a Leak Turns Into Water Damage, Call a Restoration Pro
- Sources
- FAQ
Safety Checklist Before You Inspect the Water Line
Water and electricity share the same floor space behind your fridge, so unplug the appliance before you touch anything wet. Never reach toward an outlet or the compressor panel with wet hands or while standing in a puddle.
- Shut off the water supply at the shutoff valve, then unplug the fridge from the wall
- Lay towels and a bucket to contain water before you start moving the appliance
- Wear closed shoes with grip, and clear the floor path so you're not sliding the fridge over standing water
- Check that outlets near the leak aren't submerged before restoring power to anything
Pro Tip: If water has reached an outlet or power strip, leave it alone and call an electrician before you plug anything back in.
What Usually Causes a Fridge Water Line Leak?
Most refrigerator leaks trace back to one of three areas: a blocked defrost drain, a damaged or loose supply line, or trouble at the water filter and inlet valve. Knowing which category you're in saves you from tearing into the wrong part.
- Supply line failures: Plastic tubing cracks, kinks, or develops pinholes over years of vibration and temperature swings. Braided stainless lines resist this far better than the thin plastic tube most fridges ship with.
- Connection failures: Compression nuts loosen over time, ferrules crack, and older saddle valves (the kind that pierce a copper pipe) are notoriously leak-prone.
- Filter and inlet issues: A non-genuine or improperly seated filter can weep at the filter head, and a cracked inlet solenoid valve will drip even when the line itself is fine.
- Drain and pan issues: A clogged defrost drain or a cracked drain pan pushes water out from underneath the fridge, mimicking a supply-line leak even though the water line is untouched.
Water travels along tubing before it drips, so a puddle under the crisper drawer doesn't always mean the leak started there. Trace the tube back to where it actually breaches.
How Do You Find the Exact Source of the Leak?
Pull the fridge away from the wall, but don't yank it. Most refrigerators sit on adjustable rollers, and you'll want slack in the water line before it stretches taut. Grab a flashlight, an adjustable wrench, a bucket, and a stack of paper towels before you start.
- Pull the fridge out slowly, watching the water line for tension, and stop as soon as you have working room behind it.
- Dry the entire area with towels, then step back and watch for a few minutes without touching anything.
- Run the ice maker or water dispenser a few times. A slow weep at a fitting often only shows up under active water pressure, not while the line sits idle.
- Check both connection points: the wall shutoff valve and the fitting where the line enters the back of the fridge. These are the two most common failure spots.
- Inspect the drain pan and defrost drain hole, usually located at the back bottom of the fridge interior or underneath, for standing water or a slow drip unrelated to the supply line.
- Check the filter head if your model uses an internal filter. A filter that isn't fully seated will show wetness right around the filter housing itself.
Use dry paper towels as tracing tools. Press one against each suspect joint and note exactly which one comes back wet first. LG's troubleshooting guidance recommends checking that only a single line marker is visible at the fitting; if the tubing has slipped, that alone can cause a slow leak. Mark the exact spot with a piece of tape before you turn the water back on, so you know precisely where to watch when the pressure returns.
How to Fix a Refrigerator Water Line Leak Yourself
Before any repair, shut off the water, unplug the fridge, and let residual pressure bleed off by running the dispenser once with the line closed. Every fix below assumes you've done that first.
- Tighten a loose compression fitting. Use two wrenches, one to hold the valve body steady and one to turn the nut, and go about a quarter turn past finger-tight. Overtightening cracks the ferrule rather than fixing the leak, so stop as soon as the drip stops.
- Replace plastic tubing with a braided stainless line. Measure the old line's length, add a few inches for a gentle service loop behind the fridge, and route it away from sharp appliance edges before tightening both ends.
- Splice a damaged plastic tube with a push-to-connect union. Cut the tube square using a tubing cutter rather than scissors. An oval or ragged cut won't seat inside the union's O-ring, and that's the single most common reason these repairs fail.
- Replace a cracked inlet solenoid valve. Label each electrical connector with tape before disconnecting anything, and match the replacement part to your exact model number. This one often requires ordering a brand-specific part.
| Tool or Material | Typical Use |
|---|---|
| Tubing cutter | Square cuts on plastic supply line for push-to-connect unions |
| Adjustable wrench (two) | Tightening compression nuts without twisting the valve body |
| Push-to-connect union | Splicing damaged plastic tubing without crimping tools |
| Braided stainless line | Permanent replacement for brittle plastic tubing |
| Teflon tape | Sealing threaded connections at the shutoff valve |
| Bucket and towels | Containing residual water during disconnection |
Pro Tip: KitchenAid's own installation guidance points out that a non-genuine or improperly seated filter cartridge is a common, easily missed cause of leaks that look like a supply-line problem. Check the filter fit before you replace any tubing.
Fast Fixes to Stop Water Damage Right Now
If you can't complete a full repair immediately, buy yourself time without making things worse.
- Shut off the water and unplug the fridge if you haven't already, then move electronics, rugs, and boxes away from the wet zone
- Give the compression nut a light quarter turn tighter if it's the source, but stop the moment resistance increases
- Cap the line with a push-to-connect union only after confirming the water is fully off, never while pressurized
- Lift the edge of any carpet nearby and prop it up to dry, and slide a towel barrier under wood cabinets to catch wicking moisture
- Photograph the damage, the leak location, and the affected flooring or cabinetry before cleanup, in case you need it for an insurance claim
Preventing the Next Refrigerator Water Line Leak
A little routine maintenance beats another mopping session. Swap plastic supply tubing for braided stainless the first time you replace it, not after it's already cracked, and leave a gentle service loop with a clip securing it to the wall or fridge frame so vibration doesn't work it loose again.
- Inspect every connection point behind the fridge every six months, checking for corrosion, wetness, or a loosened nut
- Replace the water filter on the schedule your manufacturer specifies, since a worn filter seal is a common slow-leak source
- Flush and check the defrost drain seasonally, especially before summer humidity spikes
- Install a $20 to $40 battery water alarm near the base of the fridge for early warning
- Replace an old saddle valve with a proper quarter-turn ball valve tapped into the pipe; saddle valves are notoriously unreliable and worth upgrading the first time you're already back there
If your home has hard water, add a yearly full inspection to that schedule. Mineral buildup accelerates wear at every fitting and inside the inlet valve.
What Does It Cost to Fix a Leaking Refrigerator?
DIY parts run cheap. A braided stainless replacement line, a push-to-connect union, and basic tools together typically land between $8 and $30, and most simple splices or tightening jobs take 30 to 60 minutes.
- Simple fixes (tightening a nut, splicing a union): 30 to 60 minutes, parts under $30
- Inlet valve replacement: 60 to 120 minutes, plus the cost of a model-specific part
- Saddle valve replacement with proper pipe work: often 2+ hours or best left to a plumber
- Hiring a plumber or appliance technician for a line swap or shutoff replacement: roughly $100 to $400 depending on scope
Those numbers change fast once water has soaked flooring or cabinetry. A leak caught in an hour costs you a roll of paper towels. One that ran overnight under a wood floor can mean pulled baseboards, subfloor drying, and a restoration bill that dwarfs the original repair.
When Should You Call a Professional Instead of DIY?
Some situations aren't worth the risk of a weekend repair attempt.
- The leak has been running long enough to soak flooring, subfloor, or cabinetry rather than sitting as a fresh puddle
- Water is pooling near an outlet, power strip, or the compressor's electrical panel
- The inlet valve body itself is cracked, not just the fitting, which usually means a full valve replacement
- You've already tried tightening or replacing a fitting and the leak returned within days
- You notice a musty smell, swelling wood, warped flooring, or cabinet bottoms that feel soft
When you call, be ready to describe exactly where the leak is, whether water reached the floor or cabinets, and what you've already tried. That gets you a faster, more accurate quote.
How Restoration Professionals Handle Water Damage From a Fridge Leak
Once water has spread past the fridge itself, the job shifts from plumbing to drying out a structure before mold gets a foothold. A certified crew follows a fairly consistent sequence.
- Emergency extraction and containment — pulling standing water and setting containment barriers so it doesn't spread to adjoining rooms.
- Moisture mapping — using meters to find exactly how far water traveled under flooring and behind cabinet toe kicks, since visible wetness is often smaller than the actual spread.
- Drying or removing affected materials — running air movers and dehumidifiers, or removing baseboards and flooring sections that can't dry in place.
- Antimicrobial treatment and monitoring — treating exposed surfaces and rechecking moisture levels over several days to confirm the structure is actually dry, not just dry-looking.
- Documentation for insurance — photographing damage and logging drying progress to support a claim.
A 30-minute response window matters most in the first hour after a leak, before water finishes wicking into subfloor and cabinet cores where it's much harder and slower to remove.
Expect a same-day or faster arrival window from a reputable crew, professional-grade dehumidifiers and air movers rather than a box fan from the garage, and a drying timeline that usually runs three to five days depending on how much material got wet. If the water sat long enough to warp flooring or delaminate cabinet bases, structural repair becomes part of the job, not just drying.
Inspecting and Repairing Refrigerator Door Water Line Seals
Some refrigerators route the water line directly through the door hinge to feed an in-door ice maker or dispenser, and that path uses a rubber grommet or seal where the tube passes through the hinge assembly. Over years of door swings, that seal wears, cracks, or shifts out of position, letting water seep at the hinge rather than anywhere along the visible tubing.
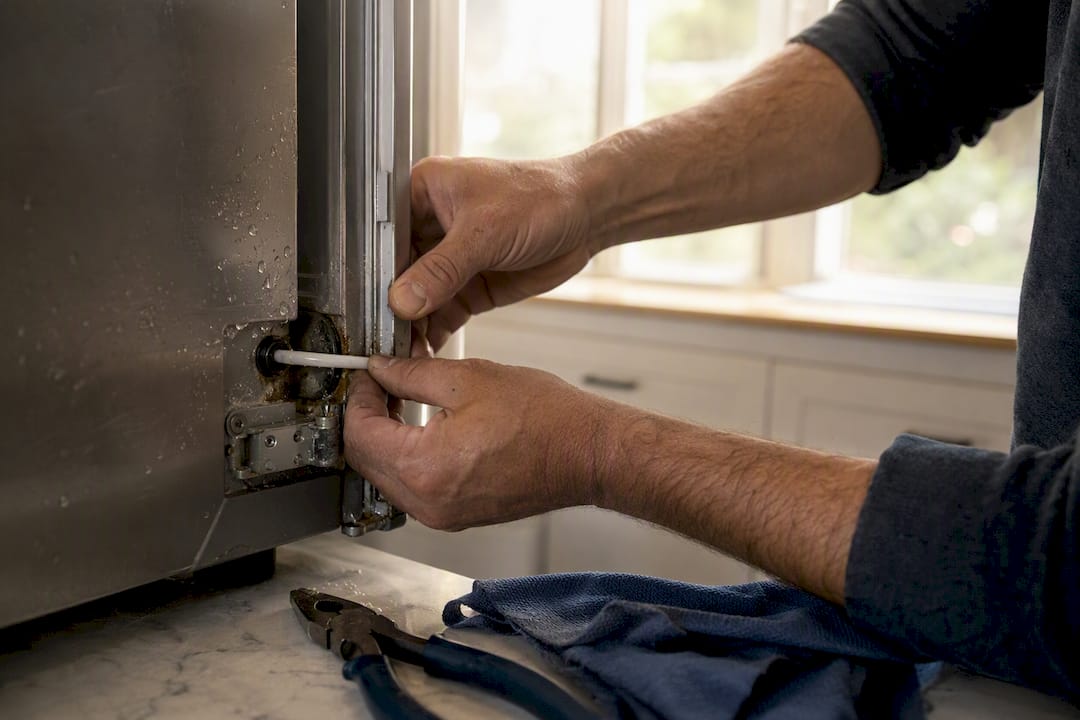
Open the door fully and look at the hinge area where the tube disappears into the door itself. A wet ring around the hinge, rather than a drip lower down, points to the door seal rather than the main supply line behind the fridge. Wipe the area dry, run the dispenser several times, and watch specifically at the hinge junction rather than the back wall connections.
Replacing this seal usually means removing the door's hinge cover, disconnecting the tube at the quick-connect fitting inside the door, and swapping the worn grommet for a new one before reseating the tube. Because these seals are model-specific, buy the exact part number for your fridge rather than a universal grommet. A poorly matched seal will look fine for a few weeks and then leak again once the rubber compresses unevenly.
If your model's door hinge tubing feels stiff, cracked, or kinked when you open the door, replace the entire door-routed section rather than just the seal. A tube that's already stressed at one point tends to fail again nearby within months.
Should You Test Your Home's Water Pressure?
Excess household water pressure stresses every fitting on the supply line, and a refrigerator's inlet valve and plastic tubing are among the weakest links in that chain. If you're chasing repeat leaks with no obvious cause, pressure is worth ruling out before you replace another part.
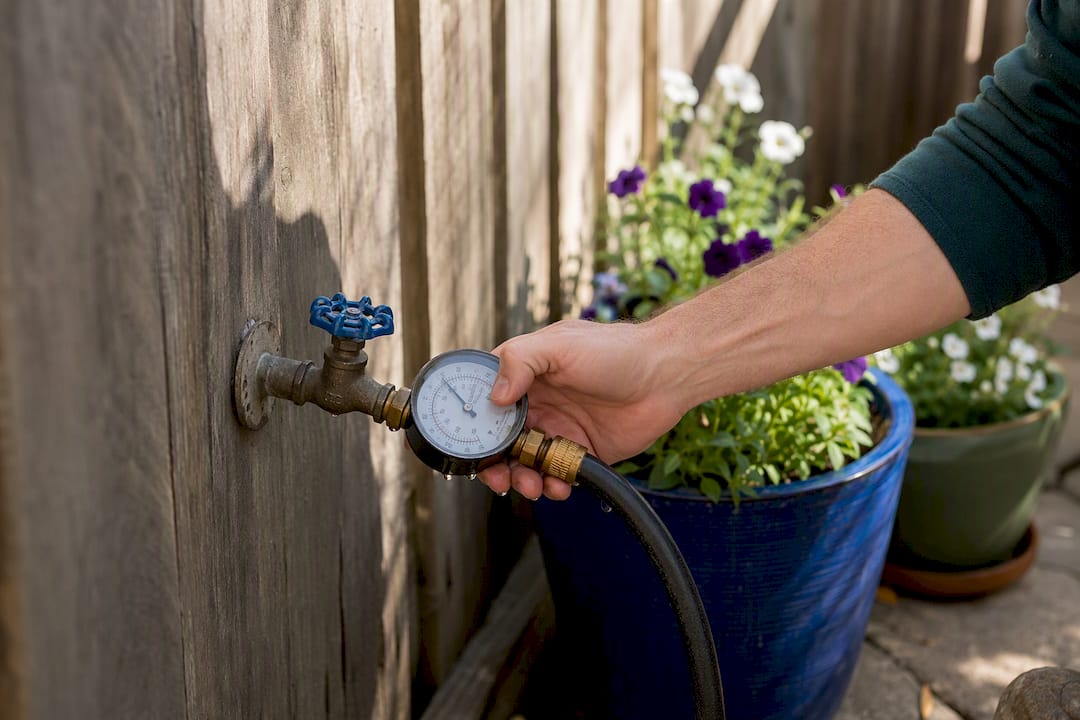
Buy a simple pressure gauge that threads onto an outdoor spigot or a laundry connection, both available for well under $20 at any hardware store. Screw it on, open the tap fully, and read the gauge. Residential water pressure is generally considered normal between 40 and 80 PSI. Anything consistently reading above 80 PSI puts extra strain on every compression fitting in your house, not just the fridge.
If your reading comes in high, a pressure-reducing valve installed at the main water line brings the whole house down to a safer range and often stops recurring drips at multiple fixtures, not just the refrigerator. This is a job most homeowners hire a plumber for, since it involves cutting into the main supply line.
Test pressure again after any city water main work in your area, since utility changes can shift household pressure without any warning. If you've replaced a fitting twice in the same spot and it keeps leaking at the same joint, high pressure, not a bad repair, is often the real explanation.
Do Temperature Swings and Defrost Cycles Cause Leaks?
Refrigerators run through automatic defrost cycles that briefly warm the freezer coils to melt accumulated frost, and that meltwater is supposed to drain through the defrost tube into a pan under the fridge where it evaporates. Temperature swings around the appliance, whether from a hot garage installation, a sunny kitchen window, or a furnace vent blowing nearby, change how often and how hard that defrost cycle has to work.
A fridge running in a hotter environment defrosts more aggressively and more often, which pushes more water through the drain system each cycle. If that drain has even a partial clog, water backs up faster than it would in a cooler, more stable spot, and it's more likely to overflow the pan rather than evaporate cleanly. This is why a fridge in a garage or a sun-exposed kitchen often develops "mystery" puddles that have nothing to do with the water line at all.
Cold snaps create the opposite problem for the supply line itself. Tubing routed near an exterior wall or an unheated space can go brittle or, in rare cases, partially freeze, which stresses fittings when the water starts flowing again. If your leak seems to show up mainly during a change in season, check the tubing's route for a cold spot before assuming a part failed.
Choosing the Right Replacement Part for Your Refrigerator
Water line parts aren't universal, and grabbing the wrong one from a hardware store shelf is one of the most common reasons a DIY fix fails within weeks. Inlet valves, filter housings, and door-routed tubing sections are usually model-specific, even across different refrigerators from the same manufacturer.
Start with your model number, usually printed on a sticker inside the fridge cabinet or behind the crisper drawers, before you order anything. Whirlpool's own troubleshooting guidance recommends checking the owner's manual for your specific model before assuming a generic part will fit. LG and KitchenAid both publish model-specific parts lookups through their support sites for the same reason: an inlet valve or filter head that looks nearly identical can have a different thread pitch, connector shape, or voltage rating.
Generic braided supply lines and push-to-connect unions are the exception. Those parts are sized by tube diameter (almost always 1/4 inch OD on residential fridges) rather than by brand, so a universal option works fine there. Where brand matching actually matters is the inlet solenoid valve, the filter cartridge, and any door-hinge sealing kit, since those interface directly with proprietary appliance electronics or housings.
When in doubt, order from the manufacturer's own parts page or a retailer that lets you search by your exact model number rather than guessing from a photo. A part that's a close but imperfect match tends to leak again within months, costing you the labor twice.
Reconnecting the Water Line Safely After Any Repair
Rushing the reconnection is how a good repair turns into a second leak a week later. Follow the same order every time, regardless of which fix you made.
- Confirm the water is still off at the shutoff valve before touching any fitting.
- Slide the tube fully onto the fitting or into the push-to-connect union until it seats against the internal stop; you should feel it click or stop advancing.
- Hand-tighten the compression nut first, then add a quarter turn with a wrench, no more.
- Open the shutoff valve slowly, not all at once, so a sudden pressure surge doesn't stress the new joint.
- Watch the connection for a full two minutes under active pressure before walking away.
- Run the dispenser or ice maker once, then recheck the joint with a dry paper towel.
- Wait 24 hours and check the spot again, since some slow weeps only show up after the tubing has cycled through a temperature change or two.
Skipping that 24-hour recheck is the single most common reason people think they fixed a leak that actually just paused.
A Practical Take on DIY Versus Calling in Help
The instinct to fix a dripping fridge yourself is the right one, most of the time. A loose fitting, a worn filter seal, or a cracked plastic tube are genuinely simple repairs that don't require special training, and manufacturer guidance from brands like KitchenAid, LG, and Whirlpool exists precisely because these are common, predictable failures with predictable fixes.
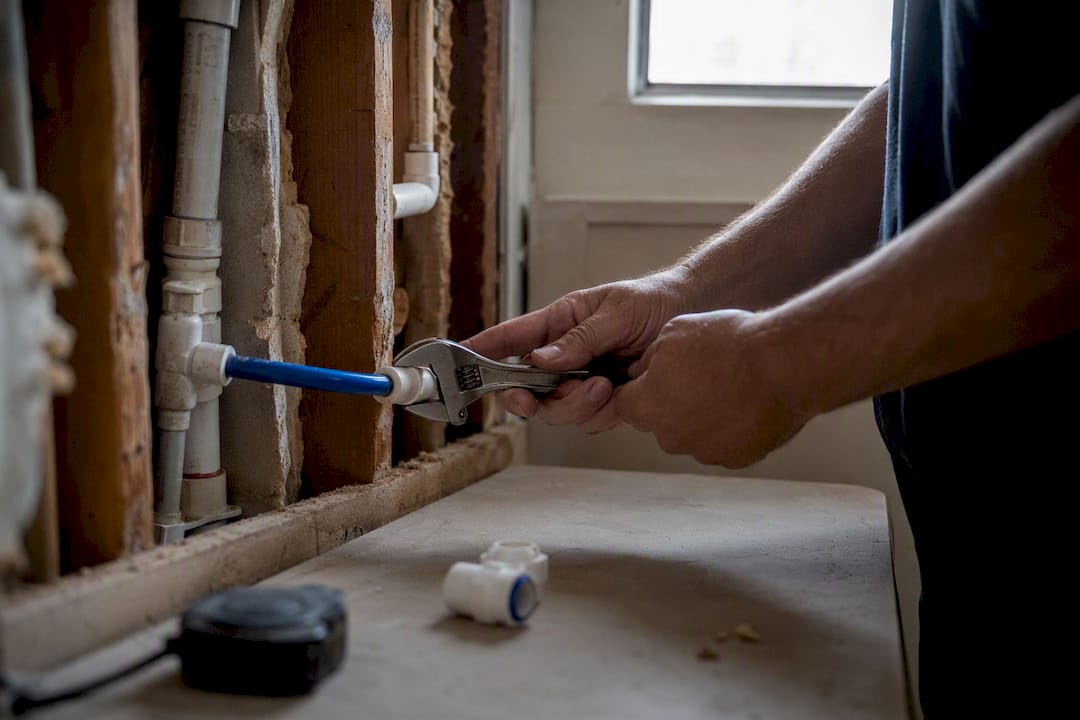
Where people get into trouble is timing. A fridge that's been quietly leaking behind a wall of cabinets for two weeks isn't a plumbing problem anymore. It's a moisture problem, and moisture problems don't announce themselves until the smell shows up. Treat any leak you didn't catch within a day or two as a potential water damage situation, not just an appliance repair, and inspect the surrounding floor and cabinet base before declaring the job done.
The other habit worth building is treating your water line like a wear item, not a set-and-forget part. Plastic tubing has a lifespan. Check it on the same schedule you change your filter, and you'll catch the next failure before it reaches the floor.
When a Leak Turns Into Water Damage, Call a Restoration Pro
A repaired fitting doesn't undo two days of water sitting under your cabinets or soaking into hardwood. That part isn't a DIY job, and it's also not something Purerestomd handles at the appliance level. Purerestomd doesn't repair refrigerators or water lines. What it does is respond to the damage those leaks leave behind, and it does that fast: a 30-minute emergency response window across its Maryland service area, IICRC-certified technicians, and direct insurance billing so you're not fronting a restoration bill out of pocket while a claim processes.
If your kitchen floor is still wet, your cabinet base feels soft, or you're catching a musty smell that wasn't there last week, that's the point to stop troubleshooting and call in an assessment. Reach out to Pure Resto for a 24/7 emergency evaluation, and if the water reached carpet or upholstery nearby, ask about their carpet cleaning and drying services in the same visit. Catching hidden moisture early is what keeps a plumbing fix from turning into a mold remediation job weeks later.
Sources
- What to Do if There is Water on the Floor (KitchenAid producthelp)
- LG refrigerator troubleshooting: a leaking refrigerator (LG Support)
- How to fix a leaky refrigerator (Lifehacker)
- Refrigerator Water Line Leaking? Fix It in 30 Minutes (FixUpFirst)
- How to fix a refrigerator that is leaking water (Whirlpool blog)
FAQ
What are the most common problems with ice maker water lines?
Cracked or kinked plastic tubing, loose compression fittings, and a filter that isn't fully seated cause most ice maker line leaks, along with occasional clogs in the defrost drain that get mistaken for supply line problems.
Why would a refrigerator leak water from underneath?
Water under the fridge usually comes from a clogged defrost drain overflowing the drip pan, a cracked drain pan, or a supply line connection dripping down behind the appliance and pooling at the base.
Do refrigerator water lines need to be replaced eventually?
Plastic supply tubing typically wears out over years of vibration and temperature exposure, and upgrading to a braided stainless line when you notice cracking or stiffness prevents the next leak rather than just patching this one.
How much does it cost to fix a refrigerator that's leaking water?
A simple DIY tightening or splice job runs $8 to $30 in parts and takes under an hour, while hiring a plumber or appliance technician for a valve or shutoff replacement typically costs $100 to $400 depending on the scope of work.